
Elecrow CrowPanel 5.79" E-Paper ESP32 S3 Based Display Review
Review of the Elecrow CrowPanel 5.79” E-Paper ESP32 Display – A well-built e-paper module with Wi-Fi, and GPIOs. Great for low-power dashboards, but lacks ESPHome support.
I recently received the Elecrow E-Paper 5.79" HMI ESP32 Board, an ESP32-based e-paper display designed for low-power IoT applications. Unlike traditional LCDs, e-paper offers ultra-low power consumption and excellent readability in bright environments, making it ideal for applications like weather stations, dashboards, and home automation interfaces. This review covers my first impressions, setup experience, and overall usability.
About the Elecrow E-Paper Board #
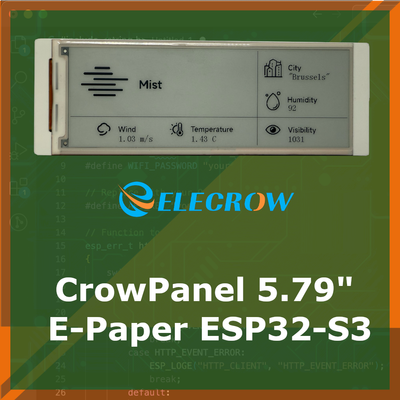
The Elecrow CrowPanel ESP32 5.79” E-paper HMI Display is an advanced display module that combines the ESP32-S3 microcontroller with a 5.79-inch e-paper screen. This integration offers a solution for various applications, including electronic labels, e-book readers, and smart home devices.
Price & Availability #
Where to Buy: The CrowPanel E-Paper is available for purchase from Elecrow's official website or directly from Aliexpress.
Price Range: As of now, the module is priced at $31.90.
When comparing the Elecrow CrowPanel ESP32 5.79” E-paper HMI Display to similar offerings from Waveshare, you can see the Elecrow's pricing is pretty great.
For instance, a similar Waveshare's 5.79-inch e-Paper Module is priced around $27.99. However, this module does not include an integrated microcontroller. In contrast, Elecrow's display, priced at $31.90, integrates the ESP32-S3 microcontroller, providing added value through built-in wireless connectivity and processing capabilities.

Technical Specifications #
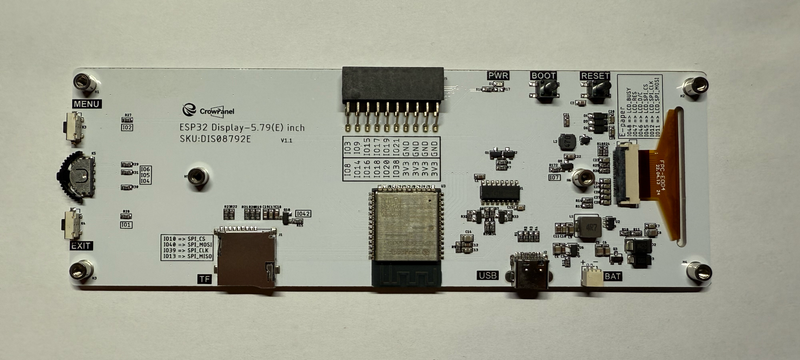
Microcontroller: Powered by the ESP32-S3 chip, which operates at a frequency of up to 240MHz.
Display: Features a black-and-white 5.79-inch e-paper screen with a resolution of 272x792 pixels.
Connectivity: Utilizes SPI interface communication for fast and stable data transmission.
Interfaces and Ports:
- UART0 Interface: For serial communication.
- 2x10 Pin GPIO Interface: Provides multiple general-purpose input/output pins for extended functionality.
- BAT Interface: Allows connection to a lithium battery, with an integrated charging circuit.
- TF Card Slot: Offers additional storage options for data logging or media display.
Buttons:
- Menu Button: Customizable for user-defined functions.
- Rotary Switch: Facilitates navigation and selection within user applications.
- Exit Button: Provides an option to exit or cancel operations.
- Reset (RST) Button: Resets the system when needed.
- Boot Button: Used to control the startup and download mode of the development board.
Unboxing & First Impressions #
What’s Inside the Package? #
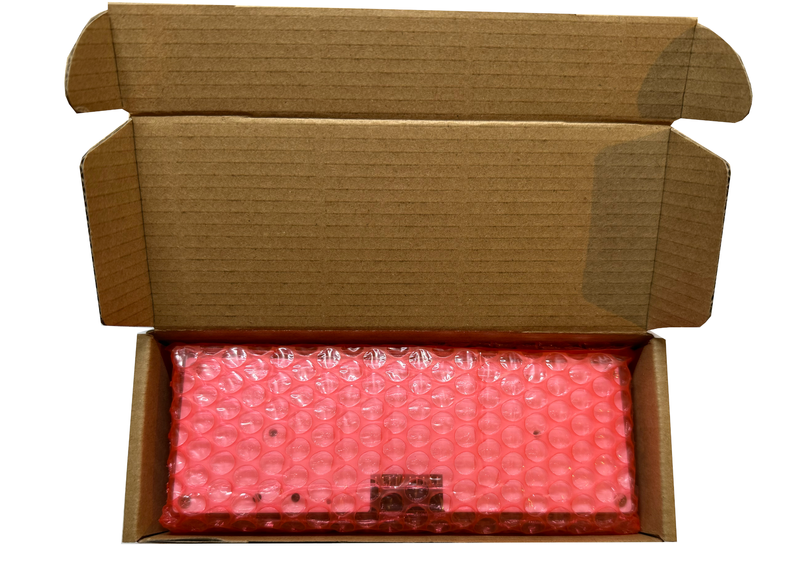
The Elecrow CrowPanel ESP32 5.79” E-paper HMI Display arrives in a nice paper box, securely packaged. Inside, the module itself is bubble-wrapped, ensuring protection during shipping.
Also included is a USB-A to USB-C cable, which is a great addition, since you won't have to search for a data cable and debug it for hours when you actually took power-only cable.
Build Quality & Design #
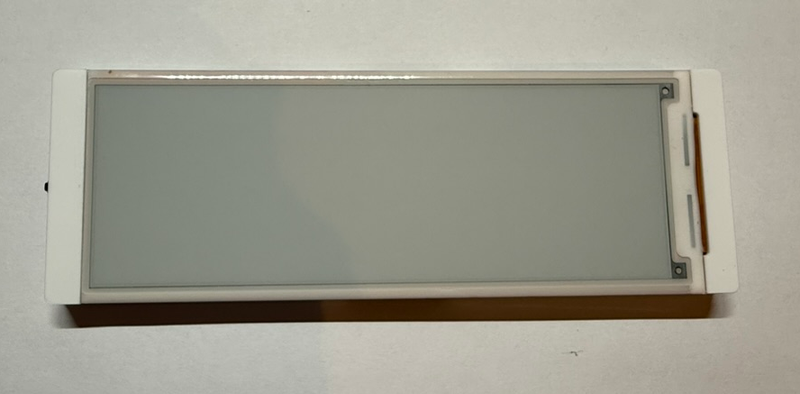
Right out of the box, the module comes with a mounted acrylic case, which adds to its durability and sleek appearance. The overall feel is sturdy and well-built, making a great first impression in terms of design and usability.
First Impressions: Screen, Buttons & Connectors #
The first impression of the screen is positive — it's a good size with clear visibility expected from an e-paper display. Beyond the standard BOOT and RST buttons, the module includes two additional buttons and a switch (which supports up, down, and push actions). This extra control input is a standout feature, making it really useful for browsing menus or navigating through UI elements without requiring an external controller.
The SD card slot, USB-C port, battery connector, and exposed GPIOs provide plenty of expansion possibilities. The only downside seems to be the battery connector placement—since it’s on top, using a battery while using the device inside the custom case could affect its sleekness. This might be a concern for those who want a fully enclosed, polished look when using a battery.
Overall, the unboxing experience and first impressions are very positive, with the sturdy build, useful buttons and switch, and good connectivity options standing out. The battery connector placement is a minor downside but not a dealbreaker.
Preinstalled Program & Out-of-the-Box Experience #
The Elecrow CrowPanel ESP32 5.79” E-paper HMI Display comes with a preinstalled demo program that provides a functional menu system, allowing to explore the board's features right out of the box. This makes the initial experience very smooth since there’s no need to flash firmware or install additional software before testing the device.
When powered on, the module boots directly into a simple menu interface. This menu can be controlled using the side switch, which has up, down, and push functionality, making navigation easy without requiring external buttons or touch input. The menu provides a set of built-in demos that showcase the screen’s capabilities, including text rendering, image display, and some basic UI elements.
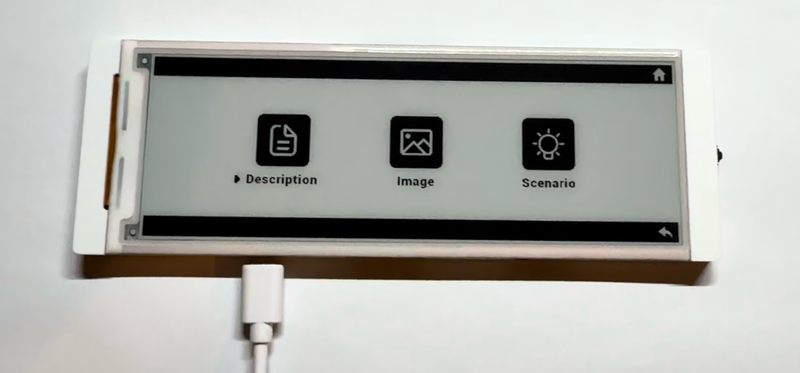
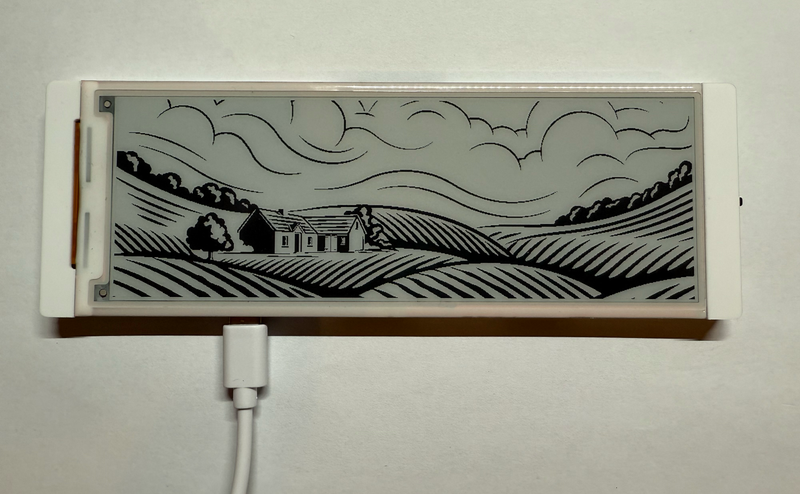
The text demo allows users to view different font sizes and styles, showing how readable various configurations are on the e-paper display. The image demo shows how the screen handles static graphics, which is useful for applications like dashboards, electronic labels, and weather stations. These demos helps to get a feel for how the screen performs without needing to write any code.
One immediate observation when browsing the menu is the screen refresh time. When switching between menu items, the full screen refresh takes a few seconds, which is expected for e-paper displays. However, the menu itself is well-designed and makes good use of the available buttons, ensuring a straightforward navigation experience.
The inclusion of a preinstalled program with a working menu system is a nice touch, as it allows users to quickly understand the module’s functionality before diving into programming. This makes it easy to test the display, buttons, and connectivity options before flashing custom firmware. Overall, the out-of-the-box experience is smooth and user-friendly, making a great first impression.
Installing Real World Example - OpenWeatherMap Weather Station #
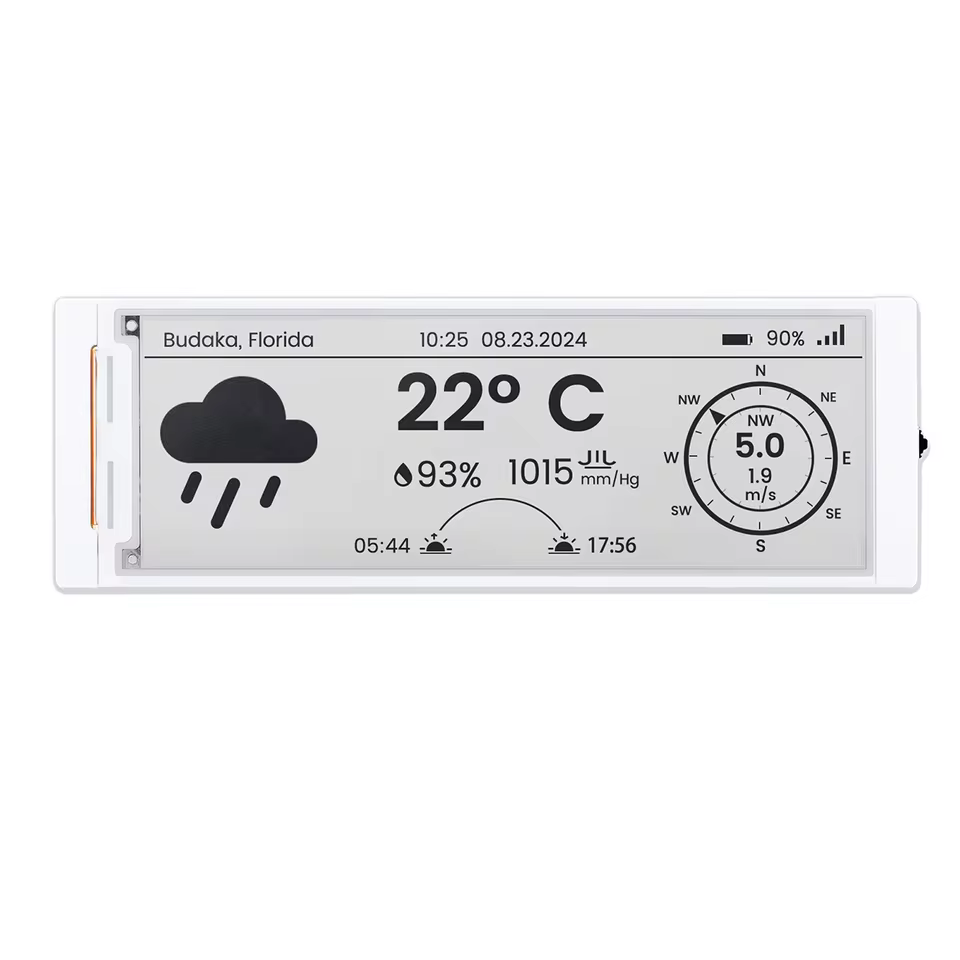
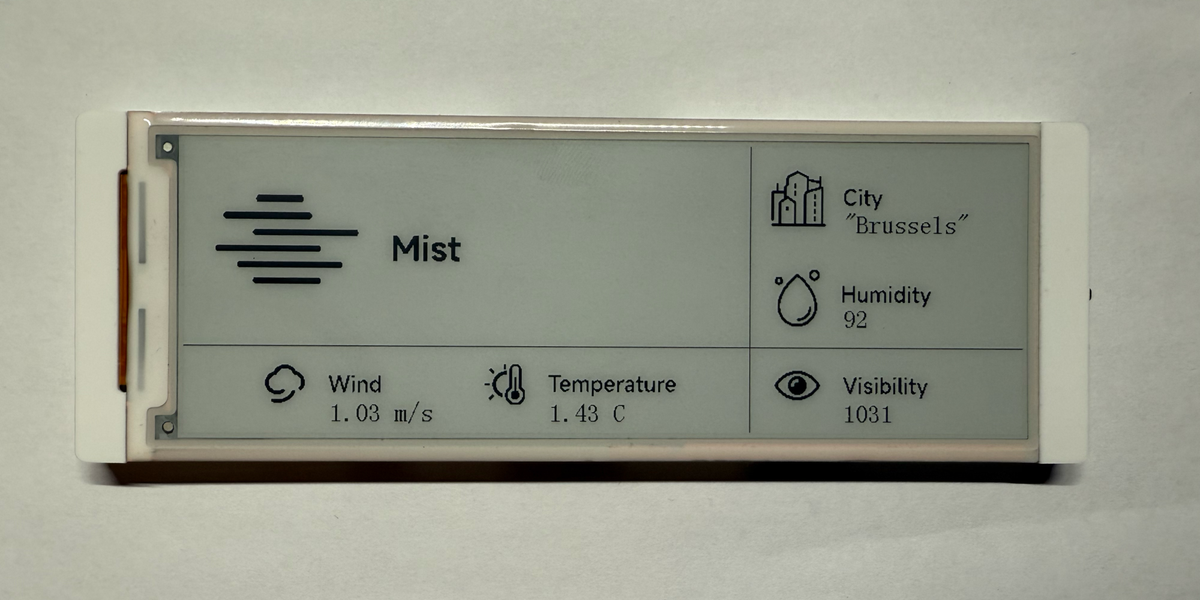
To test something actually useful on this board, Elecrow provides a weather station example that pulls real-time weather data from OpenWeatherMap and displays it on the e-paper screen.
This example uses the ESP32’s Wi-Fi to fetch live weather information from the internet and display it on the e-paper screen. Since e-paper is ultra-low power and retains images even when unpowered, this makes the CrowPanel a great option for a battery-powered weather display that only refreshes when needed.
Here’s how to install and run the OpenWeather Weather Station example on the CrowPanel.
- Download the Example Code:
- Visit the Elecrow Wiki and navigate to "Demo 2: Weather Station."
- Download the example code. Otherwise, you can download the example directly from this link.
- Extract the contents of the ZIP file to a known location on your computer.
- Open the Arduino IDE:
- Make sure you have the Arduino IDE installed. In case you don't have the Arduino IDE yet, you can follow the instructions here.
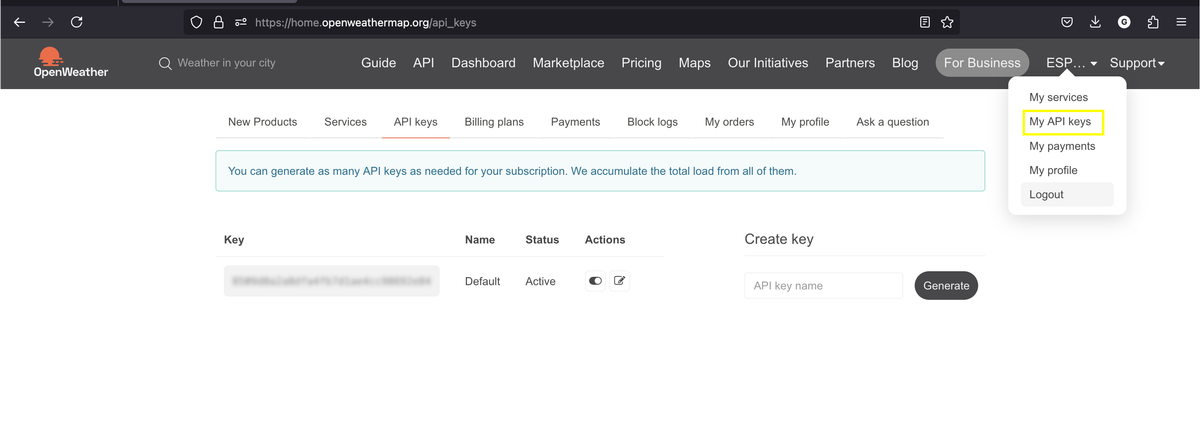
- Register for an OpenWeatherMap Account:
- Go to OpenWeatherMap and sign up for a free account.
- After registering, login and click on your username. In the dropdown, select "My API keys". Note your unique API key.
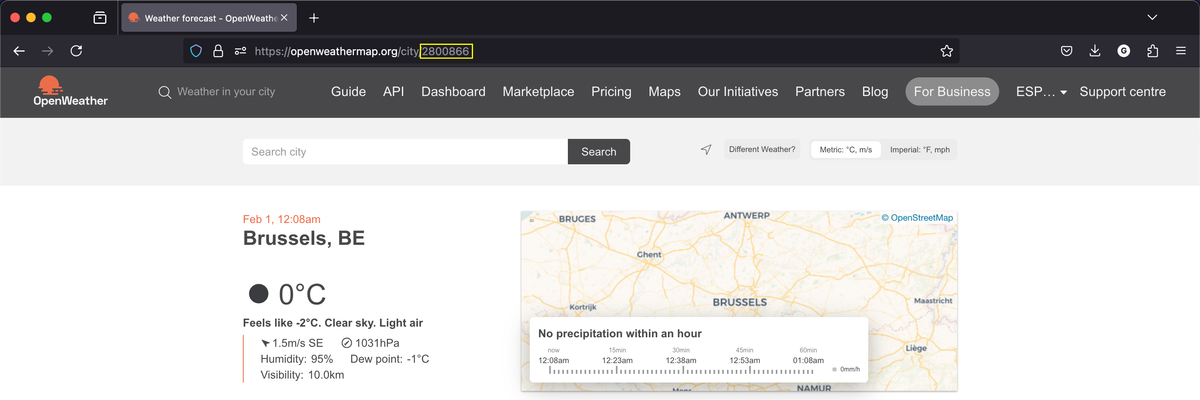
- Obtain Your City ID:
- Use the OpenWeatherMap City Finder to locate your desired city.
- Enter your city name in the search bar, and click on the city from the list
- Note the City ID from the URL.
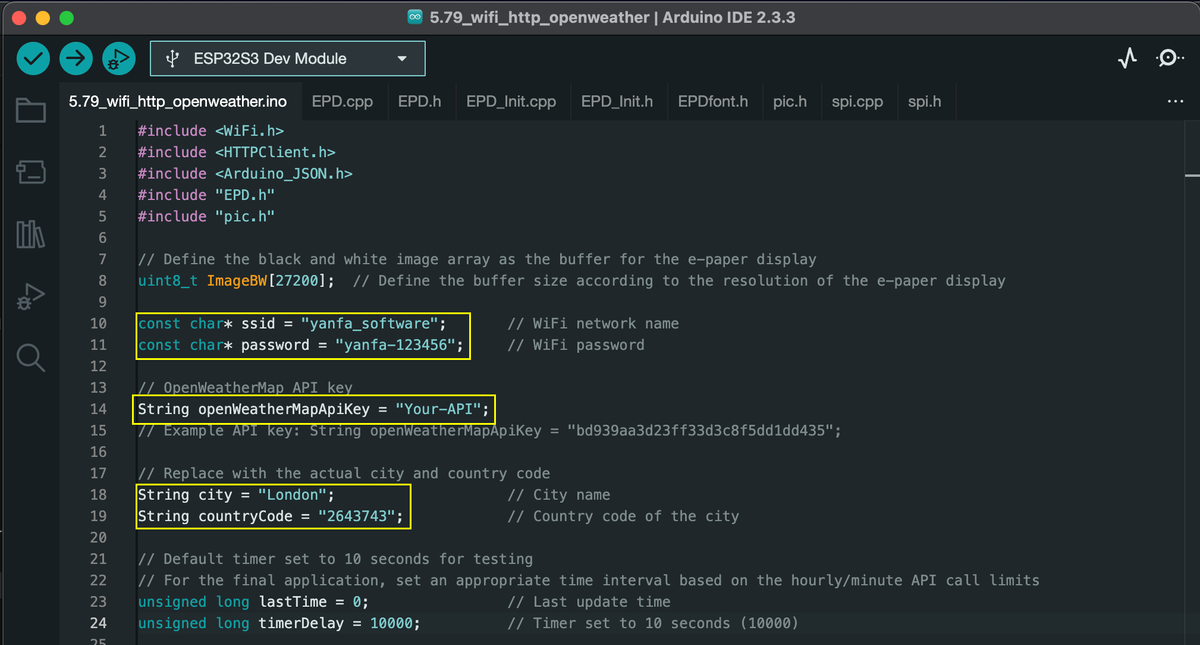
- Modify the Example Code:
- Open the extracted example code in the Arduino IDE.
- Locate the section of the code where you need to input your Wi-Fi credentials, OpenWeatherMap API key, and City ID.
- Replace the placeholder text with your actual Wi-Fi SSID, password, API key, and City ID.
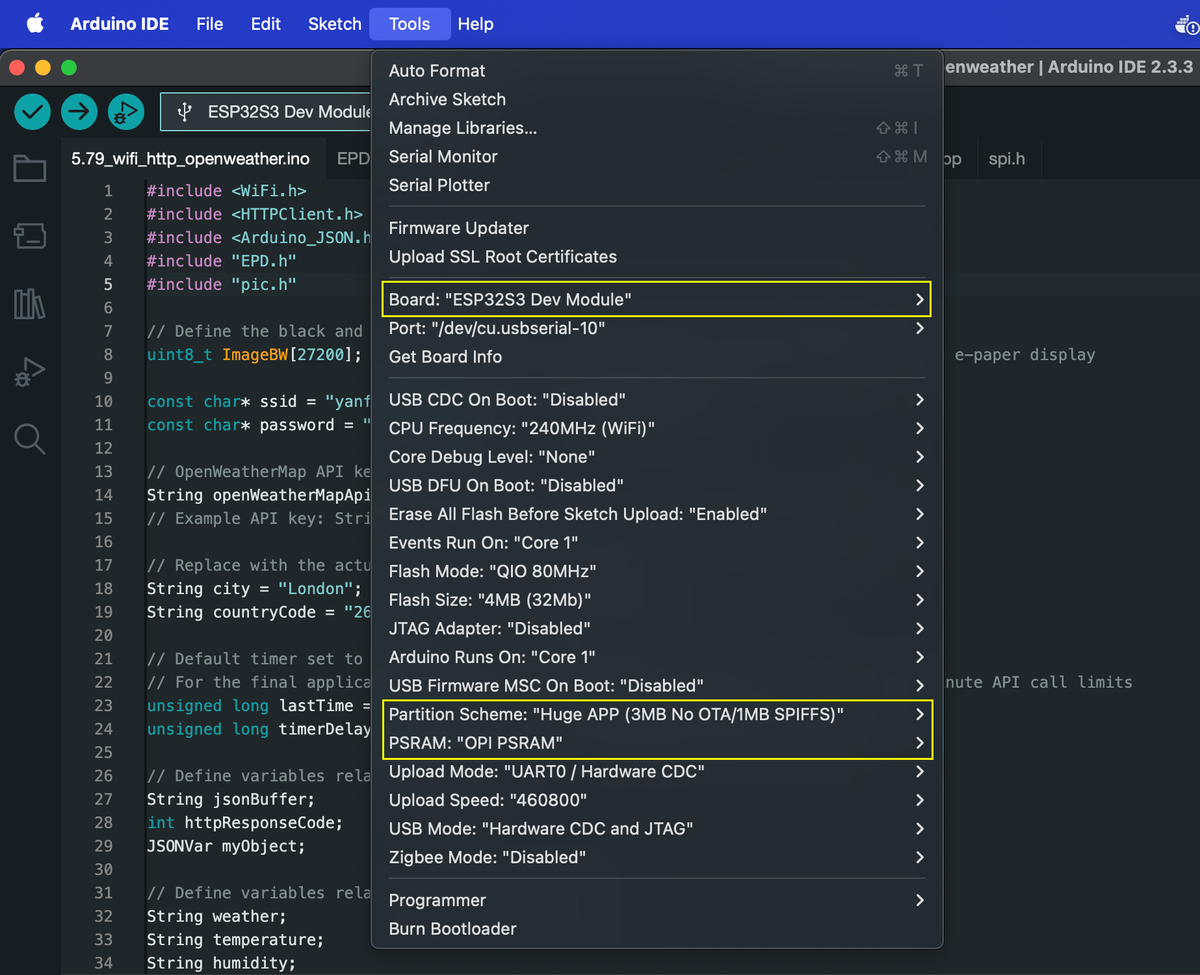
- Select the Board and Settings:
- Select ESP32 S3 Dev Module
- Partition Scheme: "HUGE APP (3MB No OTA/1MB SPIFFS)"
- PSRAM: "OPI PSRAM"
- Upload the Code to the CrowPanel:
- Connect your CrowPanel to your computer using the provided USB-C cable.
- Click the "Upload" button to compile and upload the code to the CrowPanel.
- Verify Functionality:
- Once the upload is complete, the CrowPanel should display the current weather information for your specified city, updating periodically based on the code's configuration.
Troubleshooting #
Error Uploading the Code #
The error message A fatal error occurred: Unable to verify flash chip connection (No serial data received.) means there is a connection problem with the ESP32 board.
- Check Boot Mode
- Hold the BOOT button on the ESP32-S3 board while pressing the RESET button.
- Release RESET, then release BOOT after a second.
- Try flashing again.
- Try Lower Baud Rate
- The default flashing baud rate (upload speed) is 921600, which can be unstable.
- Try flashing with 460800 or 115200 baudrate (460800 worked for me)
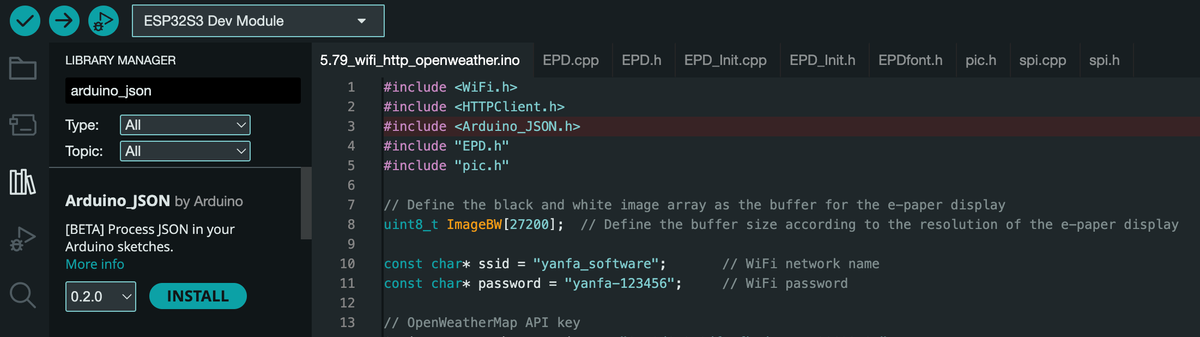
Arduino_JSON Library #
The error message fatal error: Arduino_JSON.h: No such file or directory means that the Arduino_JSON library is missing or not correctly installed in your Arduino environment. Here’s how you can troubleshoot and fix it:
- In Arduino IDE, Go to Sketch → Include Library → Manage Libraries.
- In the Library Manager, search for Arduino_JSON.
- Click Install to install the latest version.
- Try flashing again.
No ESPHome & Driver Challenges #
One of the biggest downsides of the Elecrow CrowPanel ESP32 5.79” E-paper HMI Display is the lack of ESPHome support. For home automation users who rely on ESPHome to easily integrate ESP32-based devices into platforms like Home Assistant, this is a major limitation. ESPHome makes it simple to configure and control ESP-based devices using YAML without writing complex firmware, but unfortunately, there is no built-in support for this CrowPanel yet.
That said, ESPHome support will likely come at some point, but it depends on the ESPHome community. If enough developers show interest and someone writes the necessary driver, it could be officially supported in the future. However, as of now, using this display requires writing custom firmware in Arduino or ESP-IDF, which adds complexity for those who prefer a plug-and-play ESPHome setup.
Driver Challenges & Dual Driver Complexity #
Another challenge with this board is writing a custom driver for the display. Unlike many e-paper modules that use a single e-paper driver chip, this CrowPanel uses a dual-driver setup with 2x SSD1683 drivers, which complicates development.
E-paper displays already have inherent limitations, such as slow refresh rates and complex update sequences compared to traditional LCDs. But in this case, the combination of two drivers controlling different parts of the display makes it even more difficult to create a fully custom driver from scratch.
For developers looking to customize or expand the display’s functionality, this means:
- You can’t just drop in an existing e-paper library like those used for Waveshare or Good Display modules.
- You’d need to reverse-engineer the communication protocol between the ESP32 and the e-paper controllers.
- Partial refresh support (if possible) would require deeper experimentation.
Conclusion – Is the Elecrow CrowPanel 5.79” E-paper ESP32 Board Worth It? #
The Elecrow CrowPanel 5.79” E-paper HMI Display is an affordable and well-packaged ESP32-based e-paper display that offers great value for its price. It comes with a sturdy acrylic case, a USB-C cable, and a preinstalled menu system, making it easy to start using right away. The build quality is solid, and features like multiple buttons, a rotary switch, GPIOs, and a microSD slot add to its versatility.
For IoT and low-power projects, the ESP32’s built-in Wi-Fi and the energy-efficient e-paper display make it a strong choice. The included weather station example demonstrates how it can pull real-time data and display it effectively. At $31.90, it’s a great price for a well-built ESP32-based e-paper display.
However, there are some downsides. No ESPHome support (yet) means home automation users will need to write custom firmware. The dual-driver setup makes writing custom display drivers more complicated compared to single-driver e-paper modules. The refresh rate is slow (a few seconds for a full refresh), which is expected for e-paper but limits its usability for fast-updating applications.