The Elecrow 7 Inch Display ESP32 HMI Display with ESPHome
Learn how to configure and set up the Elecrow 7.0" HMI display with ESPHome. The step-by-step guide, including pin mapping and a working ESPHome configuration.
📦 Elecrow 7-inch ESP32
💰 Where to Buy:
Prices may vary. Click to check current pricing:
However, integrating it with ESPHome has proven to be a challenging task. Despite the available documentation and official guides, including Elecrow's own documentation and ESPHome's device pages for similar Elecrow displays, issues such as screen flickering, delayed initialization, and glitches are still appearing.
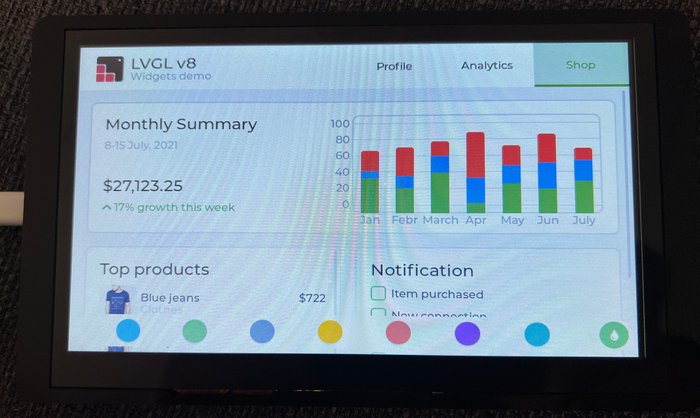
This post consolidates the findings and provides a step-by-step debugging of Elecrow 7 inch display board with ESPHome to resolve these issues, and make the board function smoothly with ESPHome. If you just want to see the working example, jump straight to Final Working Elecrow 7.0" Display Example.
The Official Elecrow Documentation #
After some diggint, we find a post explaining how to setup the Elecrow 7" ESP32 Board with ESPHome on Elecrow Wiki.
We download the assets, such as images, and the ESPHome configuration file 7.0-ESPHome.yaml form the above website. Upload it to the Elecrow by using the steps described in Setting Up ESPHome on Your First ESP32 Board, and we encounter a complication during compilation.
src/esphome/components/lvgl/lvgl_esphome.h: At global scope:
src/esphome/components/lvgl/lvgl_esphome.h:267:13: warning: 'void esphome::lvgl::lv_animimg_stop(lv_obj_t*)' defined but not used [-Wunused-function]
 static void lv_animimg_stop(lv_obj_t *obj) {
             ^~~~~~~~~~~~~~~
src/esphome/components/lvgl/lvgl_esphome.h:38:19: warning: 'lv_color_t esphome::lvgl::lv_color_from(esphome::Color)' defined but not used [-Wunused-function]
 static lv_color_t lv_color_from(Color color) { return lv_color_make(color.red, color.green, color.blue); }
                   ^~~~~~~~~~~~~
Compiling .pioenvs/elecrowlcd/driver/sdspi_transaction.o
*** [.pioenvs/elecrowlcd/src/main.o] Error 1
========================= [FAILED] Took 16.10 seconds =========================
Alright, we don’t need all the fancy LVGL features right now-we just want the screen to display something!
So, we stripped out the LVGL components and left a basic configuration tailored for the Elecrow display. We added some lambda to the display, to show some test colored circles on the screen:
    lambda: |-
      auto black = Color(0, 0, 0);
      auto red = Color(255, 0, 0);
      auto green = Color(0, 255, 0);
      auto blue = Color(0, 0, 255);
      auto white = Color(255, 255, 255);
      it.filled_circle(20, 32, 15, black);
      it.filled_circle(40, 32, 15, red);
      it.filled_circle(60, 32, 15, green);
      it.filled_circle(80, 32, 15, blue);
      it.filled_circle(100, 32, 15, white);
After uploading the firmware, the backlight turned on, which was a promising sign. However, the screen itself remained blank, showing no content.
The ESPHome Elecrow 5.0" Example #
We came across another example configuration on the ESPHome Devices Page. Although it's designed for the 5-inch screen, it shares the same 800x480 resolution as our 7-inch display, so we figured it might be compatible and worth trying out.
We quickly realized that the 5-inch screen example uses different pin mappings, but it still seemed worth a try to adapt it for our 7-inch display and see if it could work.
The ESPHome Example shows different pin mappings:
| Pin Function | ESPHome | Elecrow |
|---|---|---|
| DE Pin | 40 | 41 |
| HSYNC Pin | 39 | 39 |
| VSYNC Pin | 41 | 40 |
| Data Pins (Red) | 45 (#r1) | 14 (#r1) |
| 48 (#r2) | 21 (#r2) | |
| 47 (#r3) | 47 (#r3) | |
| 21 (#r4) | 48 (#r4) | |
| 14 (#r5) | 45 (#r5) | |
| Data Pins (Green) | 5 (#g0) | 9 (#g0) |
| 6 (#g1) | 46 (#g1) | |
| 7 (#g2) | 3 (#g2) | |
| 15 (#g3) | 8 (#g3) | |
| 16 (#g4) | 16 (#g4) | |
| 4 (#g5) | 1 (#g5) | |
| Data Pins (Blue) | 8 (#b1) | 15 (#b1) |
| 3 (#b2) | 7 (#b2) | |
| 46 (#b3) | 6 (#b3) | |
| 9 (#b4) | 5 (#b4) | |
| 1 (#b5) | 4 (#b5) |
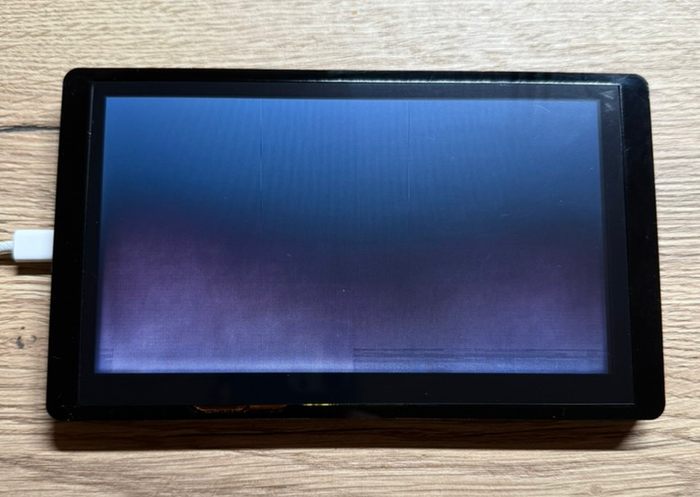
Now we’re seeing some lines running across the screen instead of just a plain white background. It’s not quite what we were aiming for, but hey - it’s progress, I guess? Not really...
Fixing the Elecrow Examples #
After some further investigation, it turns out that the Elecrow official example mappings we used earlier actually seem to be correct.
However, there is still something essential that is missing to make the display function as expected.
- Manually set hsync and vsync
The parameters of a display module in ESPHome hsync_front_porch, hsync_pulse_width, hsync_back_porch, vsync_front_porch, vsync_pulse_width, and vsync_back_porch can be used for configuring the timing of horizontal and vertical synchronization in displays manualy. Elecrow 7 inch hmi display module uses EK9716BD3 / EK73002ACGB Dispaly Driver so we set the values according to the datasheet. These values control the precise intervals and signals that tell the display when to start and stop drawing lines (horizontal sync) and frames (vertical sync) on the screen. Here’s a breakdown of what each parameter does:
hsync_front_porch: Specifies the horizontal delay between the end of one line and the start of the next.hsync_pulse_width: Determines the duration of the horizontal synchronization pulse that signals the start of a new line.hsync_back_porch: Sets the time buffer after the horizontal sync pulse before drawing begins.vsync_front_porch: Defines the vertical delay between the end of one frame and the start of the next.vsync_pulse_width: Sets the duration of the vertical synchronization pulse that signals the start of a new frame.vsync_back_porch: Creates a time buffer after the vertical sync pulse before the frame data is drawn.
So we try to add these values:
    hsync_front_porch: 40
    hsync_pulse_width: 48
    hsync_back_porch: 13

    vsync_front_porch: 1
    vsync_pulse_width: 31
    vsync_back_porch: 13
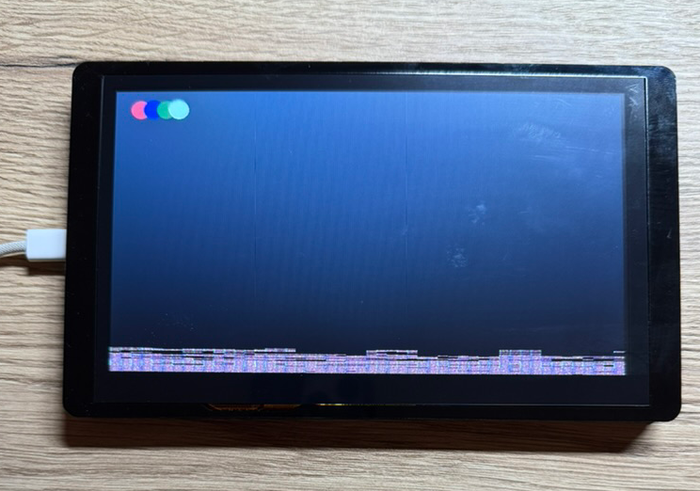
At first, doesn't look like much, the backligh lighs up, but there is still nothing on the screen. But if we keep it turned on for a few minutes, we actually start seeing the test image. But it has some artifacts / glitches on the bottom part of the screen. Not good, but now that is actual progress!
- Downgrade the ESP-IDF Framework
After even more digging, I found some suggestions of downgrading the ESP-IDF framework, as it had some changes recently. I am not exactly sure what's the actual root cause yet, but it could be due to several things:
Timing and Synchronization Changes: Updates in the ESP-IDF may alter how the ESP32 handles timing and synchronization, affecting peripherals like displays. These changes can lead to issues if the display's driver relies on specific timing sequences.
Driver Modifications: Newer ESP-IDF versions might include changes to display drivers or communication protocols, which could conflict with the existing configurations used by the Elecrow display.
Resource Management Adjustments: Updates may modify how system resources are allocated and managed, impacting the performance of connected peripherals.
So we specifically provide the ESP-IDF version in ESPHome coniguration as following:
esp32:
  board: esp32-s3-devkitc-1
  framework:
    type: esp-idf
    platform_version: 6.8.1
    version: 5.3.0
Upload the code, and Voila! Finally we have the Elecrow 7.0" Display working with the ESPHome!
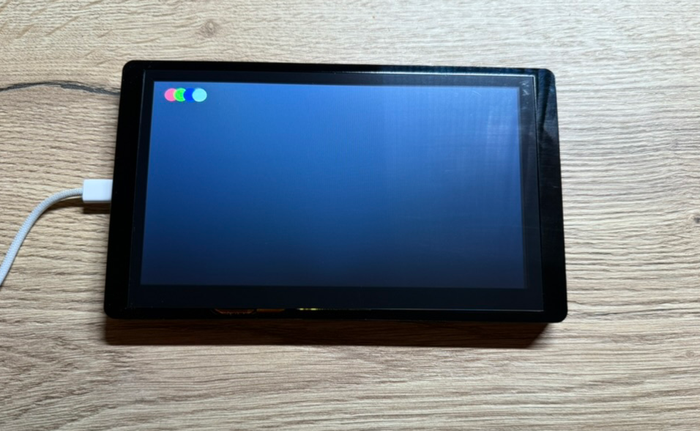
Final Working Elecrow 7.0" Display Example #
After much trial and error, we finally got the Elecrow 7.0" display working! The key was using the correct pin mappings and ensuring the configuration and libraries used matched the display's requirements. Below are the actual pin mappings for the Elecrow 7.0" display:
    data_pins:
      red:
        - 14
        - 21
        - 47
        - 48
        - 45
      green:
        - 9
        - 46
        - 3
        - 8
        - 16
        - 1
      blue:
        - 15
        - 7
        - 6
        - 5
        - 4
    de_pin: 41
    hsync_pin: 39
    vsync_pin: 40
    pclk_pin: 0
And below is the complete ESPHome configuration that works for the Elecrow 7.0" display:
esphome:
  name: elecrowlcd
  friendly_name: elecrowlcd
  platformio_options:
    build_flags: "-DBOARD_HAS_PSRAM"
    board_build.esp-idf.memory_type: qio_opi
    board_build.flash_mode: dio

esp32:
  board: esp32-s3-devkitc-1
  framework:
    type: esp-idf
    platform_version: 6.8.1
    version: 5.3.0
    # Required to achieve sufficient PSRAM bandwidth
    sdkconfig_options:
      CONFIG_ESP32S3_DEFAULT_CPU_FREQ_240: y
      CONFIG_ESP32S3_DATA_CACHE_64KB: y
      CONFIG_SPIRAM_FETCH_INSTRUCTIONS: y
      CONFIG_SPIRAM_RODATA: y

# Enable logging
logger:

# Enable Home Assistant API
api:
  encryption:
    key: "xhKn8BNx3gxWmVr324g+PcFbJqkHmghHG4iW1/nqbLQ="

wifi:
  ssid: !secret wifi_ssid
  password: !secret wifi_password

  # Enable fallback hotspot (captive portal) in case wifi connection fails
  ap:
    ssid: "Elecrowlcd Fallback Hotspot"
    password: "0xqFEFl8NeOC"

captive_portal:

psram:
  mode: octal
  speed: 80MHz

output:
  - platform: ledc
    pin: 2
    frequency: 1220
    id: gpio_backlight_pwm

light:
  - platform: monochromatic
    output: gpio_backlight_pwm
    name: ${devicename} Display Backlight
    id: back_light
    restore_mode: ALWAYS_ON

i2c:
  sda: 19
  scl: 20

display:
  - platform: rpi_dpi_rgb
    id: my_display
    data_pins:
      red:
        - 14
        - 21
        - 47
        - 48
        - 45
      green:
        - 9
        - 46
        - 3
        - 8
        - 16
        - 1
      blue:
        - 15
        - 7
        - 6
        - 5
        - 4
    de_pin: 41
    hsync_pin: 39
    vsync_pin: 40
    pclk_pin: 0
    hsync_front_porch: 40
    hsync_pulse_width: 48
    hsync_back_porch: 13
    vsync_front_porch: 1
    vsync_pulse_width: 31
    vsync_back_porch: 13
    pclk_inverted: true
    color_order: RGB
    auto_clear_enabled: false
    update_interval: never
    dimensions:
      width: 800
      height: 480
    lambda: |-
      auto black = Color(0, 0, 0);
      auto red = Color(255, 0, 0);
      auto green = Color(0, 255, 0);
      auto blue = Color(0, 0, 255);
      auto white = Color(255, 255, 255);
      it.filled_circle(20, 32, 15, black);
      it.filled_circle(40, 32, 15, red);
      it.filled_circle(60, 32, 15, green);
      it.filled_circle(80, 32, 15, blue);
      it.filled_circle(100, 32, 15, white);
You can use this configuration as a solid starting point to get your Elecrow 7.0" display working with ESPHome. From here, you can expand its functionality by adding more features, such as interactive touch controls, dynamic display elements, sensor data visualization, or integration with other smart home systems. We'll explore these enhancements in the next post.
If you're not sure how to upload the ESPHome configuration to ESP32, please check the Guide to Setting Up and Troubleshooting ESPHome
Conclusion #
Getting the Elecrow 7.0" display to work with ESPHome was quite a challenge. However by using the correct pin mappings, fine-tuning synchronization settings, and testing various display options, we achieved a stable and functional setup.
In the next steps, we’ll explore how to expand its capabilities by adding new features, such as touchscreen capabilities and display brightness control, sensors and api fetch.
