
Step-by-Step Programming ESP32 with JavaScript Using Espruino
Learn how to program the ESP32 with JavaScript using Espruino. This guide covers setup, flashing firmware, writing code, and interacting with hardware.
JavaScript on ESP32? Yes, It's Possible! #
If you've worked with ESP32 before, you've probably used C++ with Arduino or maybe dabbled in MicroPython. But did you know you can program an ESP32 in JavaScript? 🚀
That's where Espruino comes in. Espruino is a JavaScript runtime optimized for microcontrollers, allowing you to write JavaScript code that runs directly on ESP32 without an operating system in the way. It’s a great choice if you’re coming from web development or just want to try a different approach to embedded programming.
In this guide, we'll walk through setting up Espruino on an ESP32 board, running your first JavaScript program, and exploring how JavaScript can interact with hardware peripherals.
What is Espruino? #
Espruino brings JavaScript’s flexibility to embedded devices like the ESP32. Instead of running on an OS like Node.js, it executes code directly on the microcontroller, similar to Arduino but using JavaScript instead of C++.
Espruino brings JavaScript’s flexibility to embedded devices like the ESP32. Unlike Node.js, which requires an operating system, Espruino runs directly on the microcontroller, similar to Arduino but using JavaScript instead of C++. This allows for a different approach to embedded programming with several key advantages:
- Event-driven programming makes handling hardware interactions easy.
- Live coding & debugging via the Espruino Web IDE — no compile-upload cycle.
- Runs directly on ESP32 without an OS, keeping things lightweight.
Espruino is great for web developers, quick prototyping, and projects where you can use JavaScript’s familiar syntax and non-blocking execution hastle-free.
🆚 Espruino vs. Node.js: JavaScript in Different Worlds #
JavaScript is widely used in web development, but its role changes depending on the environment. Espruino brings JavaScript to microcontrollers like the ESP32, while Node.js is built for running JavaScript on desktops and servers. Here's how they compare:
| Feature | Espruino (JavaScript on ESP32) | Node.js (JavaScript on PC/Server) |
|---|---|---|
| Designed for | Microcontrollers (ESP32, STM32, etc.) | Servers & Web Apps |
| Runtime | Runs directly on ESP32 (bare metal) | Requires OS (Windows, Linux, macOS) |
| Event-driven? | ✅ Yes | ✅ Yes |
| Memory usage | Low | High |
| Interactive Shell (REPL)? | ✅ Yes (Espruino Web IDE) | ✅ Yes (CLI) |
| File System Support? | ❌ No* | ✅ Yes |
| Networking | ✅ Yes (via ESP32 Wi-Fi API) | ✅ Yes (built-in HTTP, WebSockets, etc.) |
💡 *Espruino lets you store JavaScript code in flash memory for persistence, but it lacks a full file system like Node.js. To store larger data files, you’d need external storage (e.g., SD card, SPIFFS).
While both Espruino and Node.js use JavaScript and support event-driven programming, Espruino is optimized for microcontrollers with a much smaller footprint and direct hardware control.
🆚 Comparing Espruino with Other ESP32 Programming Options #
When choosing a programming language for ESP32, it’s important to compare Espruino with other popular options like MicroPython, Arduino (C++), and ESP-IDF (C/C++). Each has strengths and trade-offs:
| Feature | Espruino (JavaScript) | MicroPython (Python) | Arduino (C++) | ESP-IDF (C/C++) |
|---|---|---|---|---|
| Designed for | Microcontrollers | Microcontrollers | Microcontrollers | Low-level ESP32 Development |
| Runtime | Runs directly on ESP32 | Runs directly on ESP32 | Compiled binary | Compiled binary |
| Event-driven? | ✅ Yes | ❌ No | ❌ No | ✅ Yes |
| Interactive Shell (REPL)? | ✅ Yes (Espruino Web IDE) | ✅ Yes (Thonny, WebREPL) | ❌ No | ❌ No |
| Memory usage | Low | Moderate | Low | Low |
| Ease of use | 🟢 Easy | 🟡 Medium | 🟢 Easy | 🔴 Hard |
| Direct Hardware Access? | ❌ Limited | ✅ Yes | ✅ Yes | ✅ Full Control |
💡 *REPL (Read-Eval-Print Loop) is an interactive shell that lets you run commands in real-time without compiling.
Espruino is great for quick prototyping and JavaScript developers, while MicroPython provides a similar scripting approach in Python. If you need high performance or full control over ESP32 hardware, C++ with Arduino or ESP-IDF is the better option.
Why Use JavaScript on ESP32? #
Using JavaScript for embedded development might sound unconventional, but Espruino offers some compelling benefits:
- 📡 Event-driven programming – Similar to Node.js, Espruino uses event-driven execution, making it perfect for handling things like button presses, network requests, and sensor readings efficiently.
- 🖥 Live debugging with Web IDE – No need to compile! You can write and execute code directly on the ESP32 using the Espruino Web IDE.
- 📜 Write less, do more – JavaScript allows concise, high-level code that can be easier to read compared to C++.
- 🔄 No compile-upload cycle – Just write code, hit enter, and it runs immediately.
If you’re used to JavaScript from web development, Espruino lets you use that knowledge to build IoT projects without learning an entirely new language. Plus, it’s a great alternative to MicroPython on ESP32 for those who prefer JavaScript’s syntax.
Setting Up Espruino on ESP32 #
Now that we know the strengths and limitations of using JavaScript on ESP32, let's get it up and running.
Before running JavaScript on your ESP32, you'll need to flash the Espruino firmware. This section covers the tools required and step-by-step installation.
🛠 What You Need #
To get started, you'll need:
- An ESP32 development board – See a variety of ESP32 boards here.


- A USB cable (ensure it's a data cable, not just a charging one).
- A Chrome browser or another browser supporting Web Serial API.
- A firmware flashing tool (either the Espruino Web IDE or
esptool.py).
⚡ Installing Espruino Firmware #
The easiest way to flash Espruino is via the Espruino Online Flasher using a browser. Connect your ESP32 board to the computer with a browser, before starting.
- Open Espruino Online Flasher in Chrome.
- Select the newest Espruino version, for example Espruino 2v25.
- In the Pop-up, select your ESP32 board.
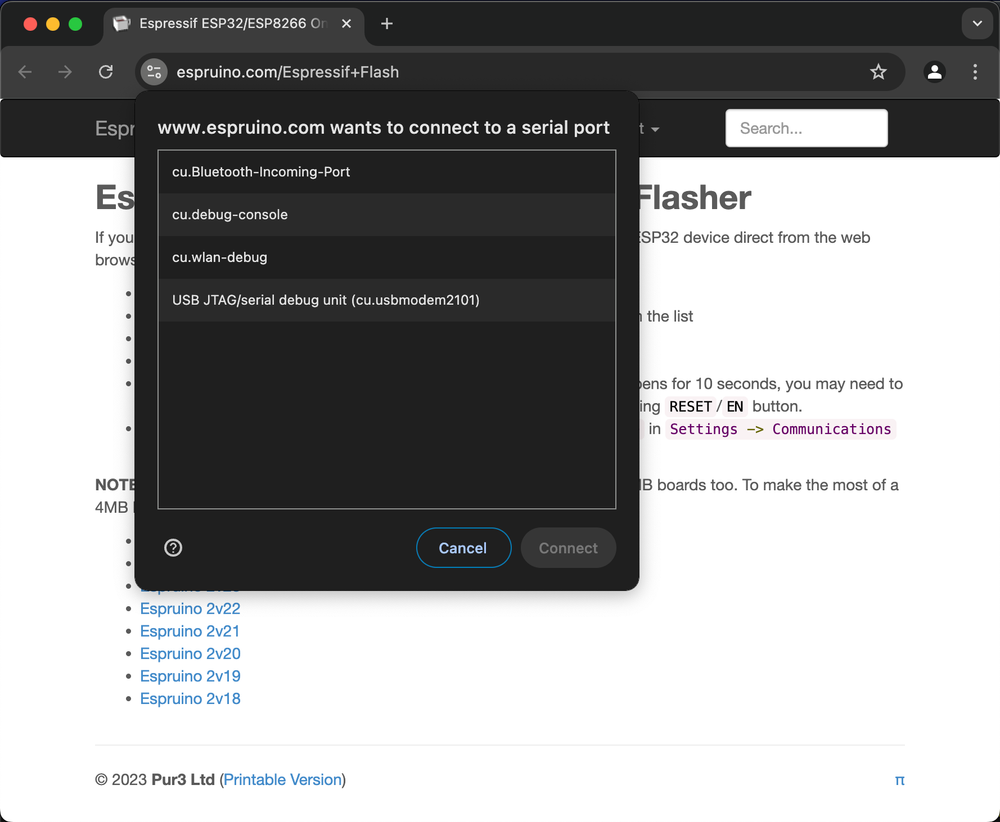
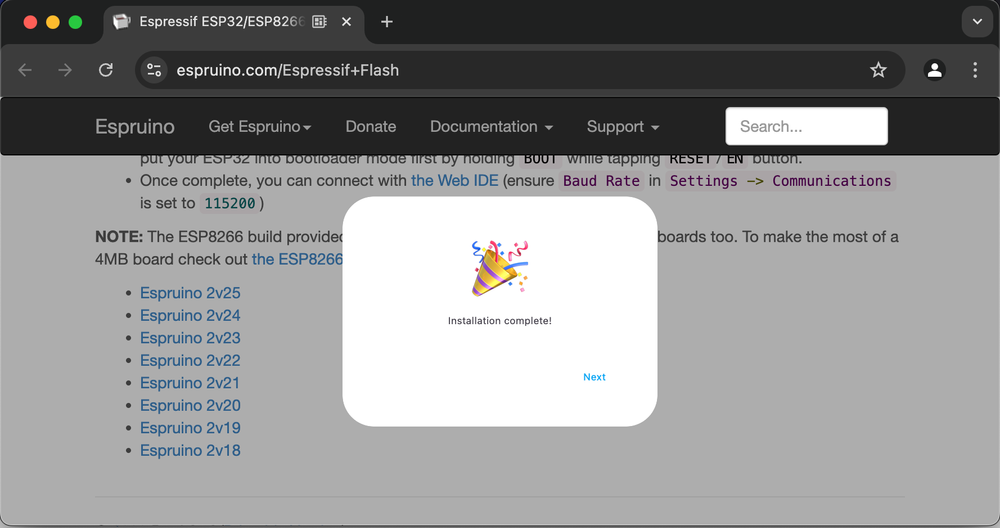
- Click Install Espruino and wait for it to complete.

- Once done, close or refresh the tab to disconnect from ESP32.
🛠 Troubleshooting #
Having trouble flashing Espruino onto your ESP32? Here are some common issues and solutions:
❌ Flashing Fails or ESP32 Not Detected #
- Ensure you have the correct USB-to-serial drivers installed. Most ESP32 boards use:
- CH340 (Download CH340 drivers)
- CP2102 (Download CP2102 drivers)
- Try using a different USB cable—some are charge-only and don’t support data transfer.
🔄 ESP32 Stuck in Boot Mode or Won't Flash #
- Hold the BOOT button while connecting the ESP32 to force bootloader mode.
Then retry flashing.
🔌 Can't Connect to Espruino Web IDE #
- Make sure no other application (Arduino IDE, serial monitor) is using the same COM/USB port.
- Press the RESET button on your ESP32 and try reconnecting.
- Change baudrate in Esprduino settings
Writing Your First JavaScript Program on ESP32 #
Now that Espruino is flashed on your ESP32, it’s time to write some JavaScript! Unlike Arduino’s loop-based programming style, Espruino uses an event-driven approach, making it more like Node.js.
🔌 Connecting ESP32 to Espruino Web IDE #
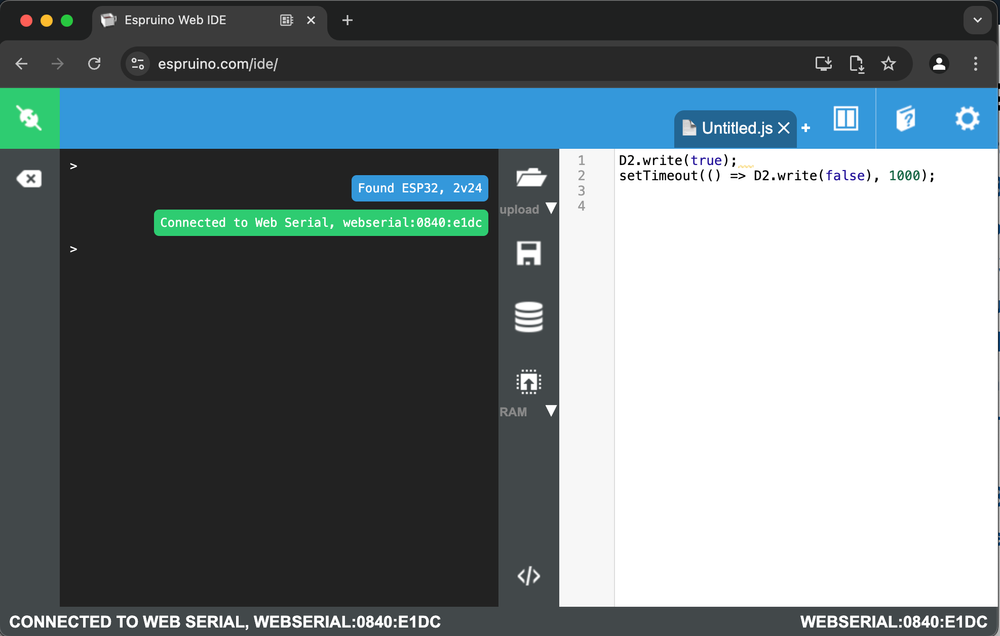
- Open Espruino Web IDE in Chrome.
- Click the Connect button (🔌) in the top left.
- Select your ESP32’s serial port (e.g.,
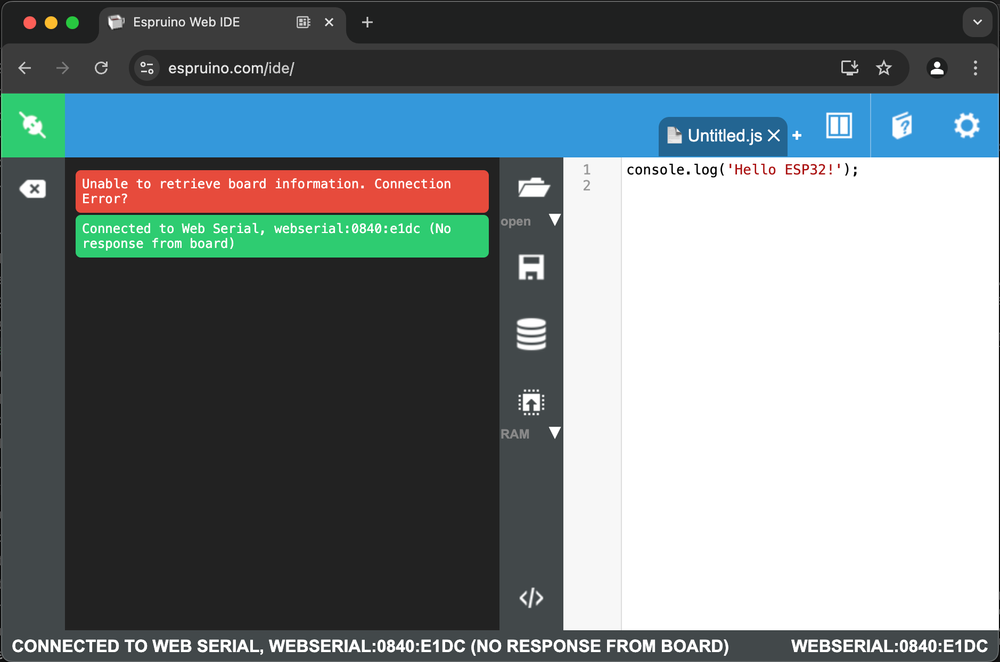
/dev/ttyUSB0,/dev/tty.modemXXXX, orCOMxon Windows). - If everything is set up correctly, you should see the Espruino interactive console (REPL) appear. 🎉
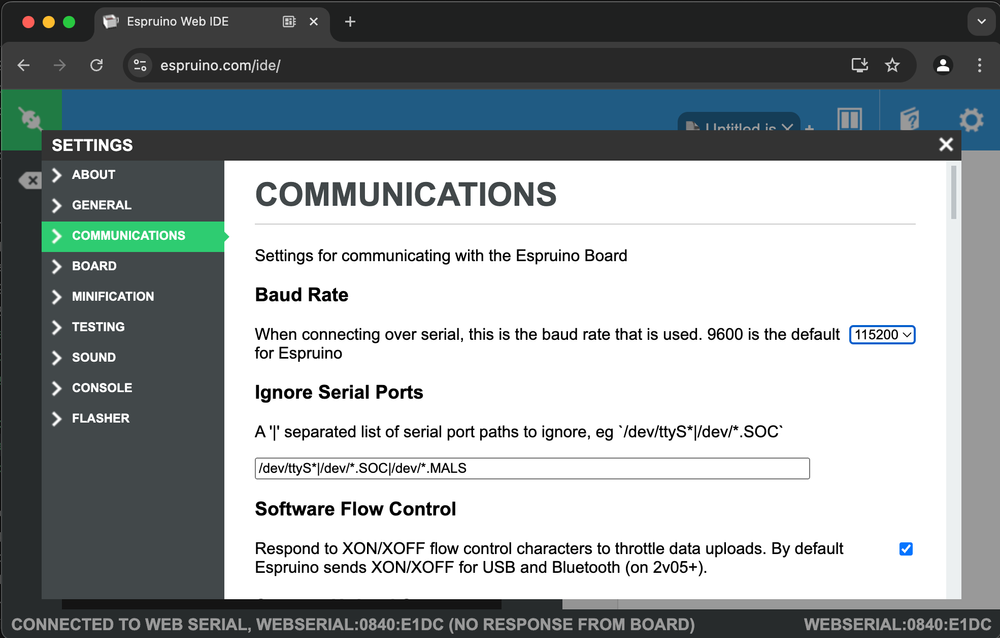
In case you see Unable to retrieve board information. Connection Error?, Try changing the baud rate in the Espruino Web IDE:
- Open Settings (⚙️) > Communications.
- Locate the Baud Rate option.
- Change it to 115200 then reconnect.
If you run into issues, check out the Troubleshooting again.
💡 Blinking an LED with JavaScript #
Let’s start with a classic LED blink example:
D2.write(true);
setTimeout(() => D2.write(false), 1000);
💡 Unlike Arduino’s digitalWrite() function, Espruino uses .write(true/false) to control GPIO pins.
🔄 Event-Driven vs. Loop-Based Programming #
One of Espruino’s biggest differences from Arduino-style programming is its event-driven execution model.
| Feature | Espruino (JavaScript) | Arduino (C++) |
|---|---|---|
| Execution Model | Event-driven (Non-blocking) | Loop-based (Blocking) |
| Blink Example | Uses setTimeout() or setInterval() | Uses delay() |
| Code Runs Continuously? | ✅ Yes, until explicitly stopped | ✅ Yes, inside loop() |
Here’s a non-blocking Espruino example that blinks an LED every second without blocking execution:
setInterval(() => {
  digitalWrite(D2, !digitalRead(D2));
}, 1000);
Contrast this with Arduino’s blocking loop() approach:
void loop() {
  digitalWrite(2, HIGH);
  delay(1000);
  digitalWrite(2, LOW);
  delay(1000);
}
💡 In Espruino, you don’t need a loop(). Instead, you schedule events using setTimeout() or setInterval(), similar to JavaScript in a web browser or Node.js.
🎯 What’s Next? #
Now that your ESP32 is running JavaScript, you can:
- Read button inputs 🖲️
- Control sensors 📡
- Connect to Wi-Fi and send HTTP requests 🌐
Limitations & Considerations #
Espruino makes JavaScript development on ESP32 easy, but it comes with trade-offs compared to ESP-IDF and Arduino (C++).
🚀 Performance #
Since Espruino runs an interpreted JavaScript engine, it's slower than compiled C++.
- Not ideal for CPU-intensive tasks (e.g., real-time sensor polling, DSP).
- Garbage collection can cause small execution delays.
💡 Need maximum performance? Consider ESP-IDF.
🧠 Memory Limitations #
ESP32 has limited RAM, and Espruino’s JavaScript engine adds overhead.
- Heap space is small – large JavaScript objects can quickly exhaust memory.
- No dynamic memory expansion like in Node.js.
📌 Tip: Keep code modular and minimize global variables.
🔌 Library Compatibility #
Espruino is not Arduino or ESP-IDF, so many C++ libraries won’t work.
- No direct support for Arduino
.inolibraries. - Limited access to advanced ESP32 features (e.g., Bluetooth).
- Some hardware modules need custom JavaScript drivers.
That said, Espruino includes built-in APIs for GPIO, I2C, SPI, PWM, and Wi-Fi.
🏆 When to Use JavaScript on ESP32? #
Espruino is a unique way to program ESP32, but when does it make sense to use JavaScript over MicroPython or C++? Let’s break it down.
✅ Best Use Cases for Espruino #
🔹 Quick Prototyping & Interactive Development
- No compile-upload cycle—just write JavaScript and run it instantly!
- The Espruino Web IDE makes testing and debugging super easy.
🔹 Web-Based IoT Projects
- If you're already comfortable with JavaScript, Espruino makes it easy to integrate ESP32 with APIs, WebSockets, and MQTT.
- Great for projects that connect to cloud services or JavaScript-driven dashboards.
🔹 Education & Learning
- JavaScript is beginner-friendly, making Espruino a great choice for teaching embedded systems without diving into C++.
- Interactive coding via REPL helps students experiment in real time.
🤔 When to Choose MicroPython or C++? #
| Need... | Best Choice |
|---|---|
| Ease of use & scripting? | MicroPython |
| Full performance & control? | ESP-IDF (C++) |
| Arduino ecosystem & libraries? | Arduino (C++) |
| Web-friendly, event-driven coding? | Espruino (JavaScript) |
💡 If you need raw performance, full hardware control, or access to Arduino’s massive library ecosystem, MicroPython or C++ is the way to go.
Conclusion #
Espruino brings JavaScript to the ESP32, making embedded programming more accessible, especially for web developers. Its event-driven model, interactive Web IDE, and fast prototyping capabilities make it ideal for IoT projects, quick experiments, and education.
However, it’s not the best choice for performance-heavy applications, real-time processing, or projects needing deep hardware access. For those cases, MicroPython, Arduino, or ESP-IDF are better suited.
If you want to explore JavaScript on ESP32, Espruino is a fun and powerful option. But if your project demands more control or efficiency, other languages might be a better fit. No matter what, ESP32 remains a flexible and exciting platform to work with.