ESP32 BMP280 Barometric Pressure and Temperature Sensor
The BMP280 is a high-precision digital barometric pressure and temperature sensor, ideal for weather monitoring, altimetry, and navigation. It supports both I²C and SPI interfaces, offering flexibility in communication protocols.
⬇️ Jump to Code Examples
🔗 Quick Links
🛒 BMP280 Price
ℹ️ About BMP280 Barometric Pressure and Temperature Sensor
The BMP280, developed by Bosch Sensortec, is a high-performance digital barometric pressure and temperature sensor. As an improvement over the BMP180 and BMP085, it offers higher accuracy, lower power consumption, and expanded features, making it ideal for weather monitoring, altimetry, and indoor navigation.
⚡ Key Features #
- Enhanced Accuracy & Efficiency – More precise than BMP180 and BMP085.
- Wide Pressure Range – Enables altitude tracking and weather forecasting.
- Integrated Temperature Sensor – Improves altitude calculations and environmental monitoring.
- I²C & SPI Communication – Provides flexible connectivity options for ESP32, Arduino, and other microcontrollers.
With its versatility and improved performance, the BMP280 is a top choice for precision altitude and weather applications. 🚀
⚙️ BMP280 Sensor Technical Specifications
Below you can see the BMP280 Barometric Pressure and Temperature Sensor Technical Specifications. The sensor is compatible with the ESP32, operating within a voltage range suitable for microcontrollers. For precise details about its features, specifications, and usage, refer to the sensor’s datasheet.
- Protocol: I2C/SPI
- Interface: I²C (up to 3.4 MHz) / SPI (up to 10 MHz)
- Pressure Range: 300 hPa to 1100 hPa
- Temperature Range: -40°C to +85°C
- Operating Voltage: 1.71V to 3.6V
- Resolution: 0.16 Pa (pressure), 0.01°C (temperature)
- Accuracy: ±1 hPa (pressure), ±1.0°C (temperature)
- Power Consumption: 2.7 µA at 1 Hz
- Output: Temperature and Pressure (Digital)
- Package Dimensions: 2.0 mm × 2.5 mm × 0.95 mm
- Weight: 1.0 g
🔌 BMP280 Sensor Pinout
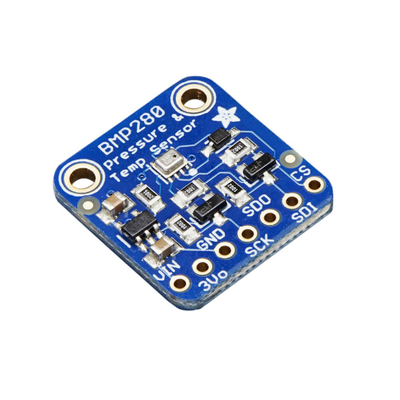
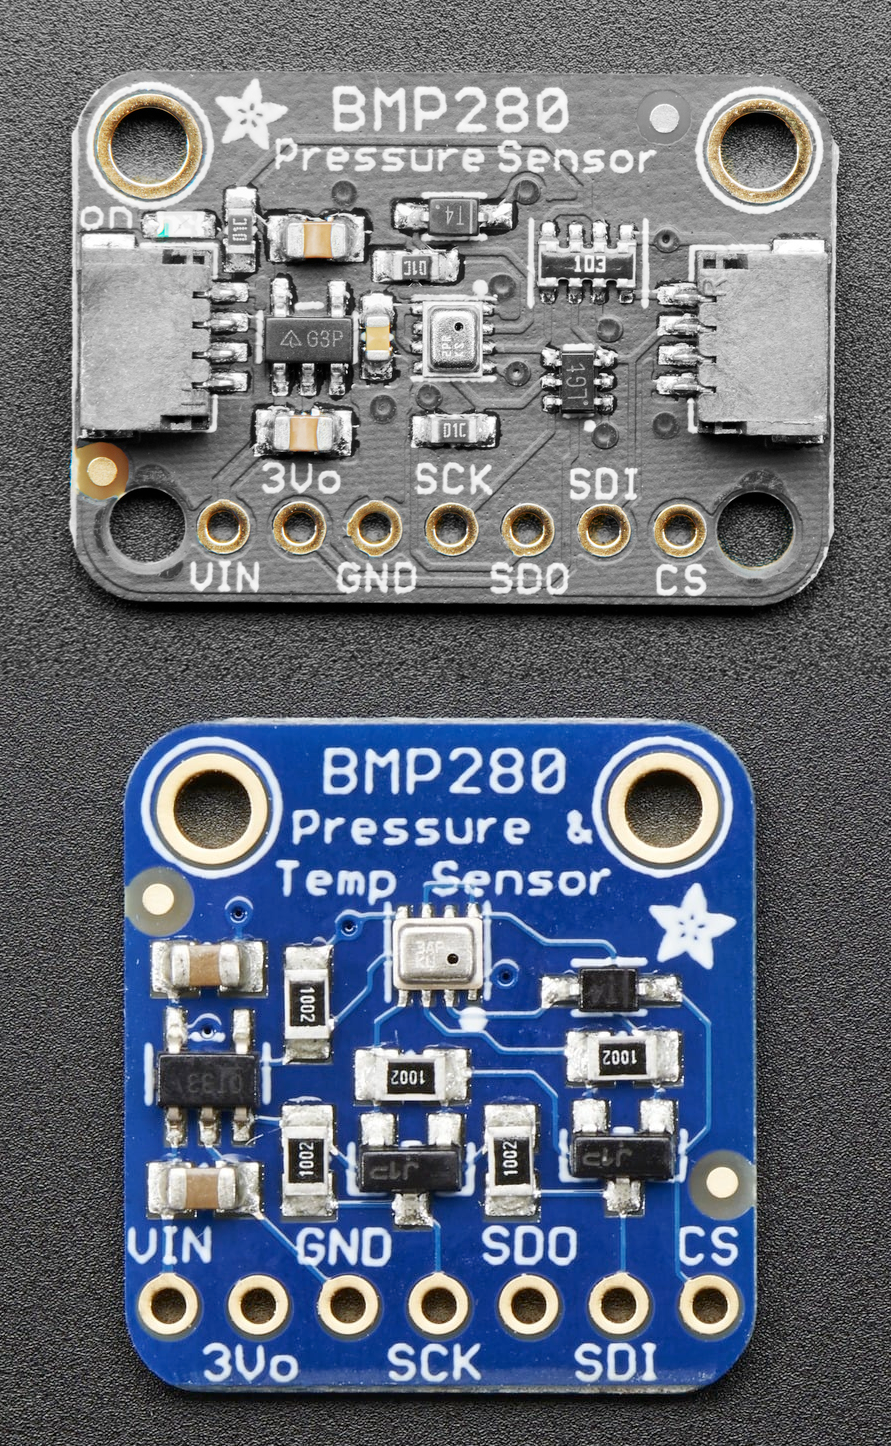
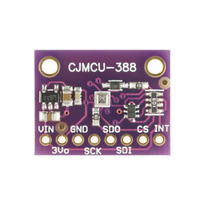
Below you can see the pinout for the BMP280 Barometric Pressure and Temperature Sensor. The VCC pin is used to supply power to the sensor, and it typically requires 3.3V or 5V (refer to the datasheet for specific voltage requirements). The GND pin is the ground connection and must be connected to the ground of your ESP32!
The BMP280 module typically includes the following pins: VCC: Power supply pin, compatible with 3.3V or 5V. GND: Ground pin. SDA: Serial Data line for I²C communication. SCL: Serial Clock line for I²C communication. CSB: Chip Select for SPI communication (connect to GND for I²C mode). SDO: Serial Data Out for SPI communication (can be left unconnected in I²C mode).
🛠️ BMP280 Barometric Pressure and Temperature Sensor Troubleshooting
This guide outlines a systematic approach to troubleshoot and resolve common problems with the . Start by confirming that the hardware connections are correct, as wiring mistakes are the most frequent cause of issues. If you are sure the connections are correct, follow the below steps to debug common issues.
⚠️ Incorrect Pressure Readings
Issue: The BMP280 sensor provides pressure readings significantly lower than expected, such as 700 hPa when the actual pressure is around 960 hPa.
Possible causes include incorrect configuration of the sensor's registers, particularly writing unintended values to reserved bits.
Solution: Ensure that when configuring the sensor's registers, especially the configuration register (0xF5), reserved bits are set to '0' as specified in the datasheet. Writing '1' to these bits can lead to erroneous pressure readings. Review your initialization code to confirm compliance with the sensor's specifications. (forum.arduino.cc)
🔒 Static Temperature and Pressure Readings
Issue: The BMP280 sensor outputs static temperature and pressure values that do not change over time, indicating a lack of new measurements.
Possible causes include operating the sensor in forced mode without re-triggering measurements, leading to repeated readings of the same data.
Solution: In forced mode, the BMP280 performs a single measurement and then returns to sleep mode. To obtain continuous measurements, you must repeatedly set the sensor to forced mode before each read operation. Alternatively, configure the sensor to normal mode for continuous measurements. Ensure your code properly handles the sensor's operating modes to acquire updated data. (esp32.com)
❌ Initialization Failure
Issue: The BMP280 sensor fails to initialize, resulting in error messages such as: Could not find a valid BMP280 sensor, check wiring!.
Possible causes include incorrect wiring, improper power supply, or issues with I2C communication.
Solution: Verify that the sensor's SDA and SCL lines are correctly connected to the corresponding pins on the microcontroller. Ensure that the sensor is powered with the appropriate voltage (3.3V or 5V, depending on the sensor's specifications). Use an I2C scanner to detect the sensor's address; if the sensor is not found, check for loose connections or potential damage to the sensor. Additionally, confirm that the correct I2C address is specified in your code, as some BMP280 modules may use different default addresses. (forum.arduino.cc)
🌡️ Incorrect Temperature Readings
Issue: The BMP280 sensor reports temperature readings that are significantly off, such as -142.6°C, indicating potential communication or configuration issues.
Possible causes include incorrect I2C address configuration, lack of pull-up resistors on the I2C lines, or faulty sensor modules.
Solution: Ensure that the correct I2C address is used in your code, typically 0x76 or 0x77 for BMP280 sensors. Verify the presence of appropriate pull-up resistors (e.g., 4.7kΩ) on the SDA and SCL lines to facilitate proper I2C communication. Additionally, consider testing the sensor with known working code and hardware to rule out defective modules. (forum.arduino.cc)
💻 Code Examples
Below you can find code examples of BMP280 Barometric Pressure and Temperature Sensor with ESP32 in several frameworks:
If you encounter issues while using the BMP280 Barometric Pressure and Temperature Sensor, check the Common Issues Troubleshooting Guide.

ESP32 BMP280 Arduino IDE Code Example
Fill in your main Arduino IDE sketch file with the following code to use the BMP280 Barometric Pressure and Temperature Sensor:
#include <Wire.h>
#include <Adafruit_Sensor.h>
#include <Adafruit_BMP280.h>

Adafruit_BMP280 bmp;

void setup() {
  Serial.begin(115200);
  if (!bmp.begin(0x76)) {
    Serial.println("Could not find a valid BMP280 sensor, check wiring!");
    while (1);
  }
}

void loop() {
  Serial.print("Temperature = ");
  Serial.print(bmp.readTemperature());
  Serial.println(" *C");

  Serial.print("Pressure = ");
  Serial.print(bmp.readPressure() / 100.0F);
  Serial.println(" hPa");

  delay(2000);
}
This Arduino code initializes the BMP280 sensor using the Adafruit BMP280 library. It reads temperature and pressure values and prints them to the Serial Monitor every two seconds. Ensure the I²C address (0x76 or 0x77) matches your sensor's configuration.
Connect your ESP32 to your computer via a USB cable, Ensure the correct Board and Port are selected under Tools, Click the "Upload" button in the Arduino IDE to compile and upload the code to your ESP32.
ESP32 BMP280 ESP-IDF Code ExampleExample in Espressif IoT Framework (ESP-IDF)
If you're using ESP-IDF to work with the BMP280 Barometric Pressure and Temperature Sensor, here's how you can set it up and read data from the sensor. Fill in this code in the main ESP-IDF file:
#include <stdio.h>
#include "driver/i2c.h"
#include "esp_log.h"
#define I2C_MASTER_NUM I2C_NUM_0
#define I2C_MASTER_SDA_IO 21
#define I2C_MASTER_SCL_IO 22
#define I2C_MASTER_FREQ_HZ 100000
#define BMP280_ADDR 0x76
static const char *TAG = "BMP280";
void i2c_master_init() {
i2c_config_t conf = {
.mode = I2C_MODE_MASTER,
.sda_io_num = I2C_MASTER_SDA_IO,
.sda_pullup_en = GPIO_PULLUP_ENABLE,
.scl_io_num = I2C_MASTER_SCL_IO,
.scl_pullup_en = GPIO_PULLUP_ENABLE,
.master.clk_speed = I2C_MASTER_FREQ_HZ,
};
i2c_param_config(I2C_MASTER_NUM, &conf);
i2c_driver_install(I2C_MASTER_NUM, conf.mode, 0, 0, 0);
}
void bmp280_read_data() {
uint8_t reg = 0xF7; // BMP280 data register
uint8_t data[6];
i2c_master_write_read_device(I2C_MASTER_NUM, BMP280_ADDR, ®, 1, data, 6, 1000 / portTICK_RATE_MS);
// Process raw data
int32_t adc_pressure = (data[0] << 12) | (data[1] << 4) | (data[2] >> 4);
int32_t adc_temperature = (data[3] << 12) | (data[4] << 4) | (data[5] >> 4);
// Use calibration data and formulas from BMP280 datasheet to calculate actual values
// (calibration data reading not included in this snippet)
float temperature = ...; // Calculated temperature
float pressure = ...; // Calculated pressure
ESP_LOGI(TAG, "Temperature: %.2f °C", temperature);
ESP_LOGI(TAG, "Pressure: %.2f hPa", pressure);
}
void app_main() {
ESP_LOGI(TAG, "Initializing I2C...");
i2c_master_init();
ESP_LOGI(TAG, "Reading BMP280 data...");
while (1) {
bmp280_read_data();
vTaskDelay(2000 / portTICK_PERIOD_MS);
}
}This ESP-IDF code initializes the BMP280 sensor on an ESP32 via I2C. The i2c_master_init() function configures the I2C interface. The bmp280_read_data() function reads raw data from the BMP280 registers and processes it into temperature and pressure values using calibration data and formulas. The main application loop continuously reads and logs the sensor data to the console every two seconds.
Update the I2C pins (I2C_MASTER_SDA_IO and I2C_MASTER_SCL_IO) to match your ESP32 hardware setup, Use idf.py build to compile the project, Use idf.py flash to upload the code to your ESP32.
ESP32 BMP280 ESPHome Code Example
Fill in this configuration in your ESPHome YAML configuration file (example.yml) to integrate the BMP280 Barometric Pressure and Temperature Sensor
sensor:
  - platform: bmp280
    temperature:
      name: "BMP280 Temperature"
    pressure:
      name: "BMP280 Pressure"
    address: 0x76
This ESPHome configuration integrates the BMP280 sensor. It creates sensor entities for temperature and pressure, which are monitored via the I2C address 0x76. The configuration is ideal for home automation and IoT systems, enabling real-time environmental monitoring.
Upload this code to your ESP32 using the ESPHome dashboard or the esphome run command.

ESP32 BMP280 PlatformIO Code Example
For PlatformIO, make sure to configure the platformio.ini file with the appropriate environment and libraries, and then proceed with the code.
Configure platformio.ini
First, your platformio.ini should look like below. You might need to include some libraries as shown. Make sure to change the board to your ESP32:
[env:esp32dev]
platform = espressif32
board = esp32dev
framework = arduino
lib_deps =
    adafruit/Adafruit BMP280 Library
    wire
monitor_speed = 115200
ESP32 BMP280 PlatformIO Example Code
Write this code in your PlatformIO project under the src/main.cpp file to use the BMP280 Barometric Pressure and Temperature Sensor:
#include <Wire.h>
#include <Adafruit_BMP280.h>

Adafruit_BMP280 bmp;

void setup() {
  Serial.begin(115200);
  if (!bmp.begin(0x76)) {
    Serial.println("Could not find a valid BMP280 sensor, check wiring!");
    while (1);
  }
}

void loop() {
  Serial.print("Temperature = ");
  Serial.print(bmp.readTemperature());
  Serial.println(" *C");

  Serial.print("Pressure = ");
  Serial.print(bmp.readPressure() / 100.0F);
  Serial.println(" hPa");

  delay(2000);
}
This PlatformIO code uses the Adafruit BMP280 library to interface with the BMP280 sensor. It reads and prints temperature and pressure values to the Serial Monitor every two seconds. Ensure the I²C address (0x76 or 0x77) is correctly set for your module.
Upload the code to your ESP32 using the PlatformIO "Upload" button in your IDE or the pio run --target upload command.
ESP32 BMP280 MicroPython Code Example
Fill in this script in your MicroPython main.py file (main.py) to integrate the BMP280 Barometric Pressure and Temperature Sensor with your ESP32.
from machine import I2C, Pin
from bmp280 import BMP280

# Initialize I2C
i2c = I2C(0, scl=Pin(22), sda=Pin(21))

# Initialize BMP280
bmp = BMP280(i2c)

while True:
    print(f"Temperature: {bmp.temperature:.2f} °C")
    print(f"Pressure: {bmp.pressure:.2f} hPa")
    sleep(2)
This MicroPython code interfaces with the BMP280 sensor via I2C. It reads and prints temperature and pressure data every two seconds. The BMP280 MicroPython library simplifies the integration, allowing straightforward access to sensor readings.
Upload this code to your ESP32 using a MicroPython-compatible IDE, such as Thonny, uPyCraft, or tools like ampy.
Conclusion
We went through technical specifications of BMP280 Barometric Pressure and Temperature Sensor, its pinout, connection with ESP32 and BMP280 Barometric Pressure and Temperature Sensor code examples with Arduino IDE, ESP-IDF, ESPHome and PlatformIO.

