ESP32 DHT20 Temperature and Humidity Sensor
The DHT20 is a high-precision digital temperature and humidity sensor with an I²C interface. It features low power consumption, fast response, and excellent long-term stability, making it ideal for a wide range of environmental monitoring applications.
⬇️ Jump to Code Examples


🔗 Quick Links


ℹ️ About DHT20 Temperature and Humidity Sensor
The DHT20 is a high-accuracy digital temperature and humidity sensor that communicates via I²C, offering stable and reliable measurements. Its wide voltage range (2.2V – 5.5V) makes it easy to integrate into various systems.
⚡ Key Features #
- High Precision – Ensures accurate temperature & humidity readings.
- I²C Communication – Simple integration with ESP32, Arduino, and other microcontrollers.
- Wide Voltage Range – Operates from 2.2V to 5.5V, making it highly flexible.
- Versatile Applications – Used in HVAC, weather stations, home appliances, and medical devices.
With its stability and ease of use, the DHT20 is an excellent choice for climate monitoring and humidity control applications. 🚀
⚙️ DHT20 Sensor Technical Specifications
Below you can see the DHT20 Temperature and Humidity Sensor Technical Specifications. The sensor is compatible with the ESP32, operating within a voltage range suitable for microcontrollers. For precise details about its features, specifications, and usage, refer to the sensor’s datasheet.
- Type: environment
- Protocol: I2C
- Interface: I²C
- Operating Voltage: 2.2V to 5.5V
- Temperature Range: -40°C to +80°C
- Temperature Accuracy: ±0.5°C
- Humidity Range: 0% to 100% RH
- Humidity Accuracy: ±3% RH (25°C)
- Resolution: Temperature: 0.01°C; Humidity: 0.024% RH
- Power Consumption: Measuring: <1mA; Standby: 40-50 µA
- Response Time: Humidity: <8s (τ63%)
- Dimensions: 15mm x 10mm x 5mm
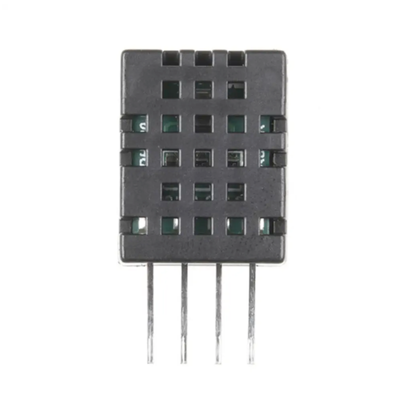
🔌 DHT20 Sensor Pinout
Below you can see the pinout for the DHT20 Temperature and Humidity Sensor. The VCC pin is used to supply power to the sensor, and it typically requires 3.3V or 5V (refer to the datasheet for specific voltage requirements). The GND pin is the ground connection and must be connected to the ground of your ESP32!
The DHT20 sensor has the following pins: VCC: Power supply input (2.2V to 5.5V). GND: Ground pin. SDA: Serial Data line for I²C communication. SCL: Serial Clock line for I²C communication.
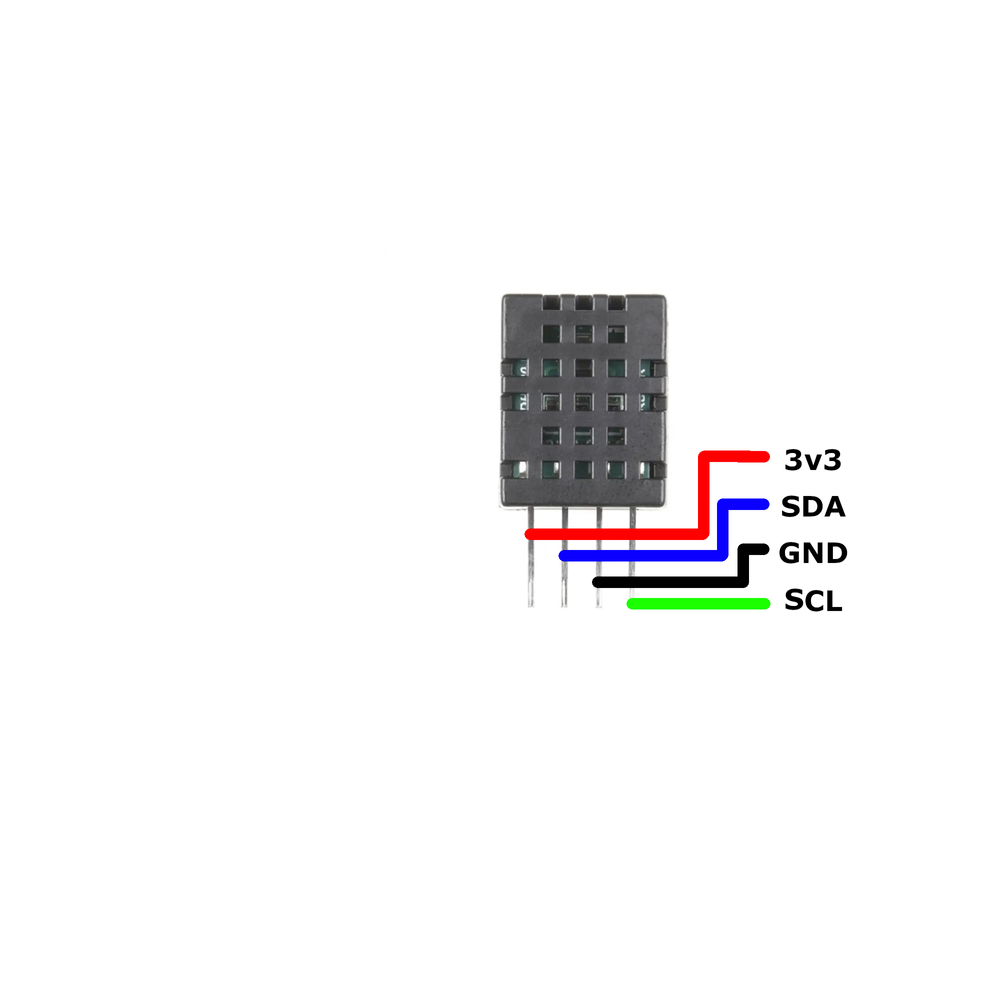
🧵 DHT20 Wiring with ESP32
Below you can see the wiring for the DHT20 Temperature and Humidity Sensor with the ESP32. Connect the VCC pin of the sensor to the 3.3V pin on the ESP32 or external power supply for power and the GND pin of the sensor to the GND pin of the ESP32. Depending on the communication protocol of the sensor (e.g., I2C, SPI, UART, or analog), connect the appropriate data and clock or signal pins to compatible GPIO pins on the ESP32, as shown below in the wiring diagram.

To connect the DHT20 sensor to an ESP32 using I²C: VCC: Connect to 3.3V on the ESP32. GND: Connect to GND on the ESP32. SDA: Connect to GPIO21 (default SDA). SCL: Connect to GPIO22 (default SCL).
🛠️ DHT20 Temperature and Humidity Sensor Troubleshooting
This guide outlines a systematic approach to troubleshoot and resolve common problems with the . Start by confirming that the hardware connections are correct, as wiring mistakes are the most frequent cause of issues. If you are sure the connections are correct, follow the below steps to debug common issues.
❌ Initialization Failure
Issue: The sensor fails to initialize, and no data is received.
Solution: Ensure that the I²C address (0x38) is correctly specified in your code. Verify that the sensor is properly connected to the I²C bus and that there are no loose connections. Use an I²C scanner to confirm that the sensor is detected on the bus.
⚠️ Incorrect Readings
Issue: The sensor provides inaccurate temperature or humidity readings.
Solution: Ensure that the sensor is not exposed to rapid environmental changes or placed near heat sources. Allow the sensor to stabilize after power-up, as recommended by the manufacturer. Calibration may be necessary for precise measurements.
🚫 Communication Errors
Issue: Communication with the sensor is intermittent or fails.
Solution: Check the integrity of the I²C connections and ensure that appropriate pull-up resistors are in place if not already included on the sensor module. Verify that the I²C bus speed is set correctly, typically 100 kHz or 400 kHz, as supported by the sensor.
💻 Code Examples
Below you can find code examples of DHT20 Temperature and Humidity Sensor with ESP32 in several frameworks:
If you encounter issues while using the DHT20 Temperature and Humidity Sensor, check the Common Issues Troubleshooting Guide.

ESP32 DHT20 Arduino IDE Code Example
Fill in your main Arduino IDE sketch file with the following code to use the DHT20 Temperature and Humidity Sensor:
#include <Wire.h>
#include "DFRobot_DHT20.h"

DFRobot_DHT20 dht20;

void setup() {
  Serial.begin(115200);
  while (dht20.begin()) {
    Serial.println("Failed to initialize DHT20 sensor!");
    delay(1000);
  }
}

void loop() {
  float temperature = dht20.getTemperature();
  float humidity = dht20.getHumidity();
  Serial.print("Temperature: ");
  Serial.print(temperature, 1);
  Serial.println(" °C");
  Serial.print("Humidity: ");
  Serial.print(humidity * 100, 1);
  Serial.println(" %");
  delay(2000);
}
This Arduino code initializes the DHT20 sensor using the DFRobot DHT20 library. In the setup() function, it attempts to initialize the sensor and prints an error message if initialization fails. In the loop() function, it reads the temperature and humidity values from the sensor and prints them to the Serial Monitor every two seconds.
Connect your ESP32 to your computer via a USB cable, Ensure the correct Board and Port are selected under Tools, Click the "Upload" button in the Arduino IDE to compile and upload the code to your ESP32.

ESP32 DHT20 ESP-IDF Code ExampleExample in Espressif IoT Framework (ESP-IDF)
If you're using ESP-IDF to work with the DHT20 Temperature and Humidity Sensor, here's how you can set it up and read data from the sensor. Fill in this code in the main ESP-IDF file:
#include "dht20.h"
#include "esp_log.h"

#define I2C_MASTER_SCL_IO 22
#define I2C_MASTER_SDA_IO 21
#define I2C_MASTER_FREQ_HZ 100000
#define DHT20_ADDR 0x38

static const char *TAG = "DHT20";

void app_main() {
    ESP_LOGI(TAG, "Initializing DHT20...");
    dht20_dev_t dev;
    dht20_init(&dev, I2C_MASTER_SCL_IO, I2C_MASTER_SDA_IO, I2C_MASTER_FREQ_HZ, DHT20_ADDR);

    while (1) {
        dht20_data_t data;
        if (dht20_read(&dev, &data) == ESP_OK) {
            ESP_LOGI(TAG, "Temperature: %.2f°C", data.temperature);
            ESP_LOGI(TAG, "Humidity: %.2f%%", data.humidity);
        } else {
            ESP_LOGE(TAG, "Failed to read data from DHT20 sensor");
        }
        vTaskDelay(2000 / portTICK_PERIOD_MS);
    }
}
This ESP-IDF code configures the ESP32 to communicate with the DHT20 sensor via I²C. The dht20_init function initializes the sensor, while the dht20_read function fetches temperature and humidity data. If successful, the data is logged to the console every two seconds; otherwise, an error message is displayed.
Update the I2C pins (I2C_MASTER_SDA_IO and I2C_MASTER_SCL_IO) to match your ESP32 hardware setup, Use idf.py build to compile the project, Use idf.py flash to upload the code to your ESP32.

ESP32 DHT20 ESPHome Code Example
Fill in this configuration in your ESPHome YAML configuration file (example.yml) to integrate the DHT20 Temperature and Humidity Sensor
sensor:
  - platform: dht
    model: DHT20
    pin: I2C
    temperature:
      name: "DHT20 Temperature"
    humidity:
      name: "DHT20 Humidity"
    update_interval: 2s
This ESPHome configuration sets up the DHT20 sensor to provide temperature and humidity data over the I²C interface. The sensor readings update every two seconds.
Upload this code to your ESP32 using the ESPHome dashboard or the esphome run command.

ESP32 DHT20 PlatformIO Code Example
For PlatformIO, make sure to configure the platformio.ini file with the appropriate environment and libraries, and then proceed with the code.
Configure platformio.ini
First, your platformio.ini should look like below. You might need to include some libraries as shown. Make sure to change the board to your ESP32:
[env:esp32dev]
platform = espressif32
board = esp32dev
framework = arduino
lib_deps =
    dfrobot/DFRobot DHT20 Library
    wire
monitor_speed = 115200
ESP32 DHT20 PlatformIO Example Code
Write this code in your PlatformIO project under the src/main.cpp file to use the DHT20 Temperature and Humidity Sensor:
#include <Wire.h>
#include "DFRobot_DHT20.h"

DFRobot_DHT20 dht20;

void setup() {
  Serial.begin(115200);
  while (dht20.begin()) {
    Serial.println("Failed to initialize DHT20 sensor!");
    delay(1000);
  }
}

void loop() {
  Serial.print("Temperature: ");
  Serial.print(dht20.getTemperature(), 1);
  Serial.println(" °C");
  Serial.print("Humidity: ");
  Serial.print(dht20.getHumidity(), 1);
  Serial.println(" %");
  delay(2000);
}
This PlatformIO code initializes the DHT20 sensor using the DFRobot DHT20 library. The program continuously reads temperature and humidity values and prints them to the Serial Monitor every two seconds.
Upload the code to your ESP32 using the PlatformIO "Upload" button in your IDE or the pio run --target upload command.
Conclusion
We went through technical specifications of DHT20 Temperature and Humidity Sensor, its pinout, connection with ESP32 and DHT20 Temperature and Humidity Sensor code examples with Arduino IDE, ESP-IDF, ESPHome and PlatformIO.