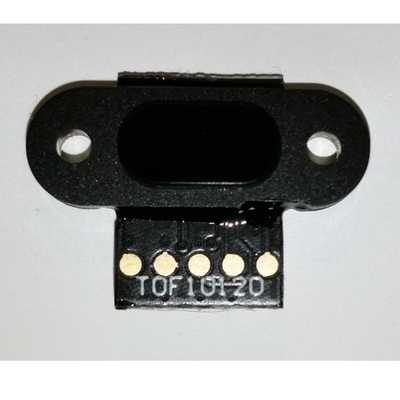
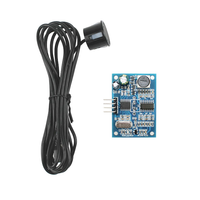
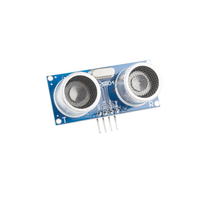
ESP32 TOF10120 Laser Distance (Time of Flight) Sensor
The TOF10120 is an advanced, high-performance laser distance sensor that uses time-of-flight technology to measure distances with remarkable accuracy and speed. Its versatility in supporting both I2C and UART communication makes it ideal for a wide range of applications, including robotics, smart devices, and industrial automation.
⬇️ Jump to Code Examples
🔗 Quick Links
🛒 TOF10120 Price
ℹ️ About TOF10120 Laser Distance (Time of Flight) Sensor
The TOF10120 is a compact laser distance sensor that uses Time-of-Flight (TOF) technology for accurate and reliable distance measurements. With a measurement range of up to 180 cm and support for I²C and UART communication, it is ideal for robotics, obstacle detection, and proximity sensing applications.
⚡ Key Features #
- Accurate Distance Measurement – Measures 10 cm to 180 cm with ±2 cm precision.
- Dual Communication Interface – Supports I²C and UART for flexible integration.
- Low Power Consumption – Operates at <30mA, making it ideal for battery-powered applications.
- Wide Voltage Compatibility – Works with 3.3V to 5V, fully compatible with ESP32 and other microcontrollers.
With its compact design and reliable TOF technology, the TOF10120 is a great choice for embedded systems and robotics applications requiring precise distance sensing. 🚀
⚙️ TOF10120 Sensor Technical Specifications
Below you can see the TOF10120 Laser Distance (Time of Flight) Sensor Technical Specifications. The sensor is compatible with the ESP32, operating within a voltage range suitable for microcontrollers. For precise details about its features, specifications, and usage, refer to the sensor’s datasheet.
- Protocol: I2C/UART
- Measurement Range: 10 cm to 180 cm
- Accuracy: ±2 cm
- Interface: I2C/UART
- Operating Voltage: 3.3V to 5V
- Power Consumption: <30mA
🔌 TOF10120 Sensor Pinout
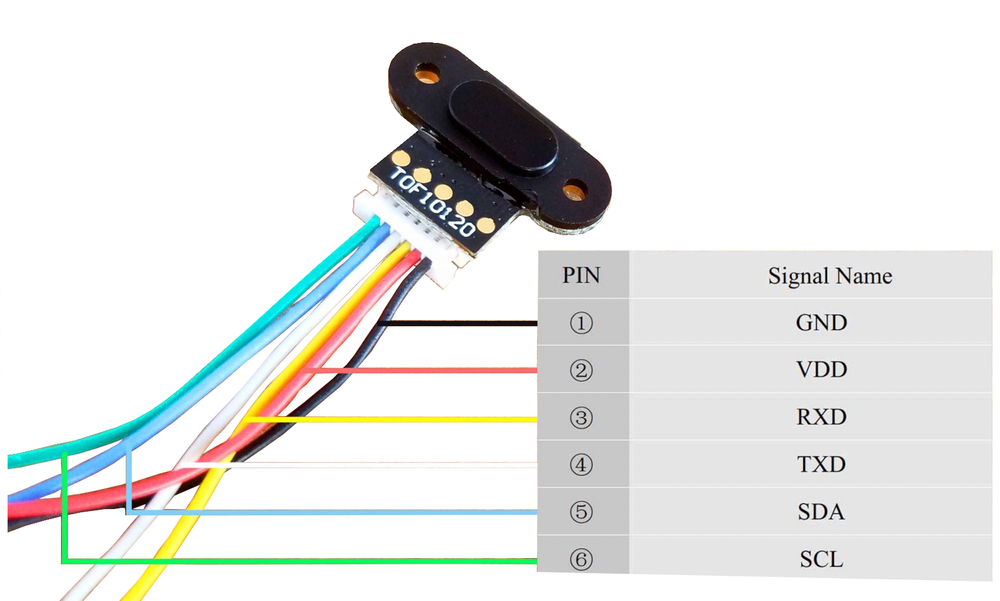
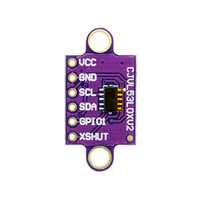
Below you can see the pinout for the TOF10120 Laser Distance (Time of Flight) Sensor. The VCC pin is used to supply power to the sensor, and it typically requires 3.3V or 5V (refer to the datasheet for specific voltage requirements). The GND pin is the ground connection and must be connected to the ground of your ESP32!
The TOF10120 pinout is straightforward, offering both I2C and UART communication options:
- VCC: Connect to a 3.3V or 5V power supply.
- GND: Ground connection to complete the circuit.
- SDA: Data line for I2C communication.
- SCL: Clock line for I2C communication.
- TX: Transmit pin for UART communication.
- RX: Receive pin for UART communication.
🧵 TOF10120 Wiring with ESP32
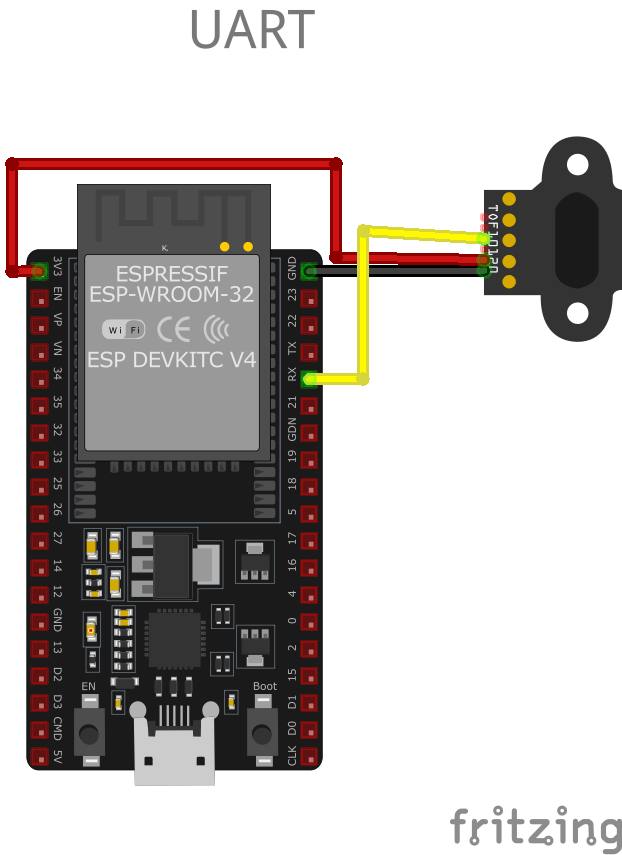
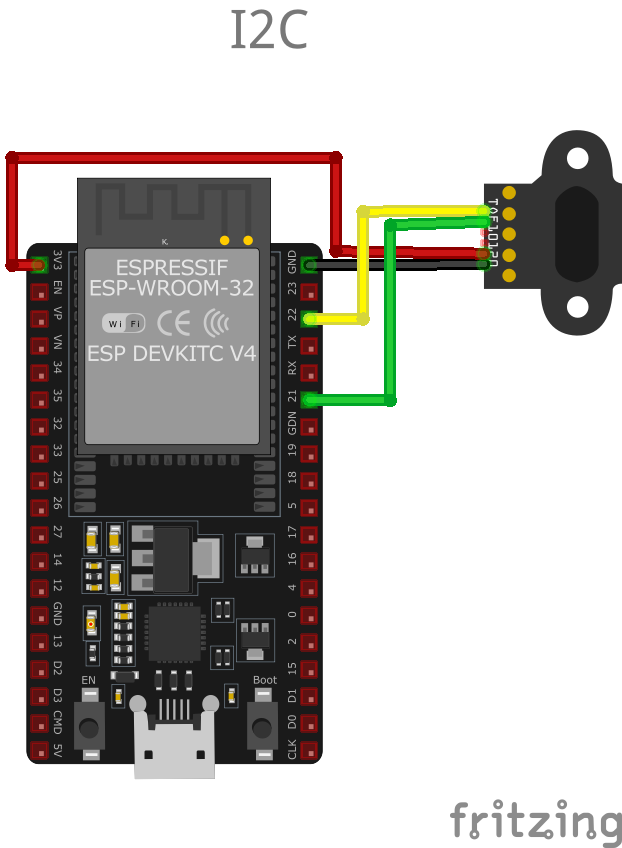
Below you can see the wiring for the TOF10120 Laser Distance (Time of Flight) Sensor with the ESP32. Connect the VCC pin of the sensor to the 3.3V pin on the ESP32 or external power supply for power and the GND pin of the sensor to the GND pin of the ESP32. Depending on the communication protocol of the sensor (e.g., I2C, SPI, UART, or analog), connect the appropriate data and clock or signal pins to compatible GPIO pins on the ESP32, as shown below in the wiring diagram.
SDA and SCL to the respective pins on the microcontroller, along with VCC and GND. For UART, connect TX and RX to the corresponding UART pins on the microcontroller. Configure the communication protocol as required by your application.🛠️ TOF10120 Laser Distance (Time of Flight) Sensor Troubleshooting
This guide outlines a systematic approach to troubleshoot and resolve common problems with the . Start by confirming that the hardware connections are correct, as wiring mistakes are the most frequent cause of issues. If you are sure the connections are correct, follow the below steps to debug common issues.
⚠️ Unstable or Incorrect Distance Measurements
Issue: The TOF10120 sensor provides fluctuating or inaccurate distance readings, even when the target object is stationary.
Possible causes include electrical noise, improper sensor alignment, or interference from ambient light sources.
Solution: Ensure that the sensor is properly aligned perpendicular to the target surface to receive accurate reflections. Minimize exposure to strong ambient light, especially direct sunlight, which can interfere with the sensor's infrared measurements. Implement filtering algorithms, such as averaging multiple readings, to mitigate the effects of occasional erroneous data.
❌ Sensor Not Detected on I2C Bus
Issue: The TOF10120 sensor is not recognized on the I2C bus, leading to communication failures.
Possible causes include incorrect I2C address configuration, improper wiring, or lack of pull-up resistors on the I2C lines.
Solution: Verify that the sensor's I2C address matches the address specified in your code; the default address is 0x52. Ensure that the SDA and SCL lines are correctly connected to the corresponding pins on the microcontroller. Check for the presence of appropriate pull-up resistors (typically 4.7kΩ) on the I2C lines if they are not already included on the sensor module.
🔄 Interference Between Multiple Sensors
Issue: When using multiple TOF10120 sensors simultaneously, their signals interfere with each other, causing inaccurate readings.
Possible causes include identical I2C addresses for all sensors or overlapping measurement zones.
Solution: Since the TOF10120 sensor has a fixed I2C address, using multiple sensors on the same bus requires additional hardware, such as an I2C multiplexer, to manage communication. Alternatively, consider using the sensor's UART mode for communication, assigning different serial ports for each sensor. Physically space the sensors apart to prevent their measurement zones from overlapping, reducing the chance of cross-talk interference.
❓ Unexpected Output Values
Issue: The sensor outputs values that do not correspond to the actual distance, even when the sensor is completely blocked or no object is present.
Possible causes include incorrect data parsing, sensor malfunction, or improper initialization.
Solution: Review the data parsing logic in your code to ensure it correctly interprets the sensor's output format. Confirm that the sensor is properly initialized and that any required calibration procedures are followed. If the issue persists, test the sensor with a known working setup to determine if it is functioning correctly or needs replacement.
💻 Code Examples
Below you can find code examples of TOF10120 Laser Distance (Time of Flight) Sensor with ESP32 in several frameworks:
If you encounter issues while using the TOF10120 Laser Distance (Time of Flight) Sensor, check the Common Issues Troubleshooting Guide.

ESP32 TOF10120 Arduino IDE Code Example
Fill in your main Arduino IDE sketch file with the following code to use the TOF10120 Laser Distance (Time of Flight) Sensor:
#include <Wire.h>

#define TOF10120_ADDR 0x52

void setup() {
  Serial.begin(115200);
  Wire.begin();

  Serial.println("TOF10120 Distance Sensor Example");
}

void loop() {
  uint16_t distance = getDistance();

  if (distance != 0) {
    Serial.print("Distance: ");
    Serial.print(distance);
    Serial.println(" mm");
  } else {
    Serial.println("Sensor error or no object detected.");
  }

  delay(500);
}

uint16_t getDistance() {
  Wire.beginTransmission(TOF10120_ADDR);
  Wire.write(0x00);
  Wire.endTransmission();

  Wire.requestFrom(TOF10120_ADDR, 2);
  if (Wire.available() == 2) {
    uint16_t distance = Wire.read() << 8 | Wire.read();
    return distance;
  }

  return 0;
}
This Arduino sketch demonstrates how to use the TOF10120 sensor with I2C communication. It begins by setting up the I2C interface using the Wire library and defines the TOF10120 I2C address (0x52). The getDistance() function sends a request to the sensor to initiate a distance measurement and then reads the resulting two-byte data. The calculated distance (in millimeters) is displayed on the Serial Monitor, with a 500 ms delay between readings.
Connect your ESP32 to your computer via a USB cable, Ensure the correct Board and Port are selected under Tools, Click the "Upload" button in the Arduino IDE to compile and upload the code to your ESP32.

ESP32 TOF10120 ESP-IDF Code ExampleExample in Espressif IoT Framework (ESP-IDF)
If you're using ESP-IDF to work with the TOF10120 Laser Distance (Time of Flight) Sensor, here's how you can set it up and read data from the sensor. Fill in this code in the main ESP-IDF file:
#include <stdio.h>
#include "driver/i2c.h"
#include "esp_log.h"

#define I2C_MASTER_NUM I2C_NUM_0
#define I2C_MASTER_SDA_IO 21
#define I2C_MASTER_SCL_IO 22
#define I2C_MASTER_FREQ_HZ 100000

#define TOF10120_ADDR 0x52

static const char *TAG = "TOF10120";

void app_main() {
    i2c_config_t i2c_config = {
        .mode = I2C_MODE_MASTER,
        .sda_io_num = I2C_MASTER_SDA_IO,
        .scl_io_num = I2C_MASTER_SCL_IO,
        .sda_pullup_en = GPIO_PULLUP_ENABLE,
        .scl_pullup_en = GPIO_PULLUP_ENABLE,
        .master.clk_speed = I2C_MASTER_FREQ_HZ,
    };
    ESP_ERROR_CHECK(i2c_param_config(I2C_MASTER_NUM, &i2c_config));
    ESP_ERROR_CHECK(i2c_driver_install(I2C_MASTER_NUM, I2C_MODE_MASTER, 0, 0, 0));

    uint8_t data[2];

    while (1) {
        i2c_master_write_to_device(I2C_MASTER_NUM, TOF10120_ADDR, NULL, 0, 1000 / portTICK_PERIOD_MS);
        i2c_master_read_from_device(I2C_MASTER_NUM, TOF10120_ADDR, data, 2, 1000 / portTICK_PERIOD_MS);

        uint16_t distance = (data[0] << 8) | data[1];
        ESP_LOGI(TAG, "Distance: %d mm", distance);

        vTaskDelay(500 / portTICK_PERIOD_MS);
    }
}
The code sets up I2C communication using the ESP-IDF framework. The sensor is configured with its I2C address (0x52). A loop sends a command to read distance data from the sensor and parses the response into a 16-bit distance value (in millimeters). The distance is logged every 500 ms. Error handling ensures the loop continues if communication issues occur.
Update the I2C pins (I2C_MASTER_SDA_IO and I2C_MASTER_SCL_IO) to match your ESP32 hardware setup, Use idf.py build to compile the project, Use idf.py flash to upload the code to your ESP32.
ESP32 TOF10120 ESPHome Code Example
Fill in this configuration in your ESPHome YAML configuration file (example.yml) to integrate the TOF10120 Laser Distance (Time of Flight) Sensor
sensor:
  - platform: tof10120
    name: "TOF10120 Distance"
    update_interval: 500ms
The ESPHome configuration uses the tof10120 platform to interface with the sensor. The name assigns a user-friendly label ('TOF10120 Distance') to the sensor data, making it identifiable in smart home platforms. The update_interval is set to 500 ms for frequent distance updates.
Upload this code to your ESP32 using the ESPHome dashboard or the esphome run command.

ESP32 TOF10120 PlatformIO Code Example
For PlatformIO, make sure to configure the platformio.ini file with the appropriate environment and libraries, and then proceed with the code.
Configure platformio.ini
First, your platformio.ini should look like below. You might need to include some libraries as shown. Make sure to change the board to your ESP32:
[env:esp32dev]
platform = espressif32
board = esp32dev
framework = arduino
monitor_speed = 115200
ESP32 TOF10120 PlatformIO Example Code
Write this code in your PlatformIO project under the src/main.cpp file to use the TOF10120 Laser Distance (Time of Flight) Sensor:
#include <Wire.h>

#define TOF10120_ADDR 0x52

void setup() {
    Serial.begin(115200);
    Wire.begin();

    Serial.println("TOF10120 Distance Sensor Example");
}

void loop() {
    uint16_t distance = getDistance();

    if (distance != 0) {
        Serial.print("Distance: ");
        Serial.print(distance);
        Serial.println(" mm");
    } else {
        Serial.println("Sensor error or no object detected.");
    }

    delay(500);
}

uint16_t getDistance() {
    Wire.beginTransmission(TOF10120_ADDR);
    Wire.write(0x00);
    Wire.endTransmission();

    Wire.requestFrom(TOF10120_ADDR, 2);
    if (Wire.available() == 2) {
        uint16_t distance = Wire.read() << 8 | Wire.read();
        return distance;
    }

    return 0;
}
This PlatformIO code demonstrates how to interface with the TOF10120 sensor using I2C communication. The code initializes the I2C bus and continuously requests distance measurements from the sensor. The getDistance() function sends a command to the sensor and retrieves a 2-byte distance value, which is then displayed on the Serial Monitor every 500 ms. The 0x52 I2C address is used for communication. This example is compatible with Arduino-compatible ESP32 boards using the PlatformIO environment.
Upload the code to your ESP32 using the PlatformIO "Upload" button in your IDE or the pio run --target upload command.

ESP32 TOF10120 MicroPython Code Example
Fill in this script in your MicroPython main.py file (main.py) to integrate the TOF10120 Laser Distance (Time of Flight) Sensor with your ESP32.
from machine import I2C, Pin
from time import sleep

# Initialize I2C communication (SDA = GPIO21, SCL = GPIO22)
i2c = I2C(0, scl=Pin(22), sda=Pin(21))

# TOF10120 I2C Address
tof_address = 0x52

def read_distance():
    # Request distance measurement
    i2c.writeto(tof_address, b'\x00')
    data = i2c.readfrom(tof_address, 2)
    # Parse two-byte response
    distance = (data[0] << 8) | data[1]
    return distance

print("TOF10120 Distance Sensor Example")

while True:
    distance = read_distance()
    print("Distance: {} mm".format(distance))
    sleep(0.5)
The MicroPython script uses I2C communication to interact with the TOF10120 sensor. The read_distance() function sends a command to the sensor and reads a 2-byte response, converting it to a 16-bit distance value. The distance is displayed on the console every 500 ms.
Upload this code to your ESP32 using a MicroPython-compatible IDE, such as Thonny, uPyCraft, or tools like ampy.
Conclusion
We went through technical specifications of TOF10120 Laser Distance (Time of Flight) Sensor, its pinout, connection with ESP32 and TOF10120 Laser Distance (Time of Flight) Sensor code examples with Arduino IDE, ESP-IDF, ESPHome and PlatformIO.

